This guide walks through the tools and workflows you can use in Cadasio to reset, create, and apply consistent camera views across your project steps.
Why camera consistency matters
When camera positions change unexpectedly between steps, it becomes harder for viewers to track what has changed. Keeping the camera stable allows the focus to remain on the action in each step, rather than on reorienting the viewer.
Cadasio allows each step to store its own camera position, giving you full control over how your presentation is viewed at every stage.
Resetting the camera for a step
Each step in Cadasio stores a saved camera position. While editing a step, it is common for the camera to move away from this saved view.
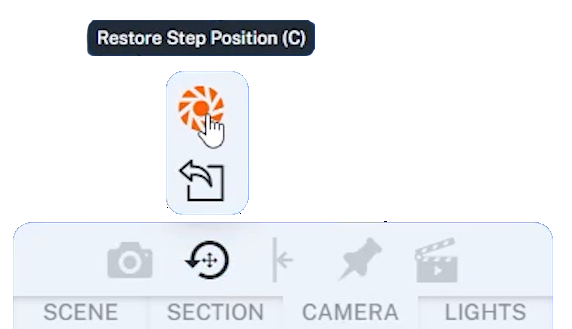
To quickly revert to the step’s saved camera position, open the Camera tab and use the Restore Step Position option. This returns the camera to the position that was saved the last time the step was updated.
For an even faster workflow, you can use the C keyboard shortcut to restore the saved camera position instantly.
Creating custom camera views
If you regularly need a specific angle, or want to reuse the same viewpoint across multiple steps, creating a custom camera is the best approach.
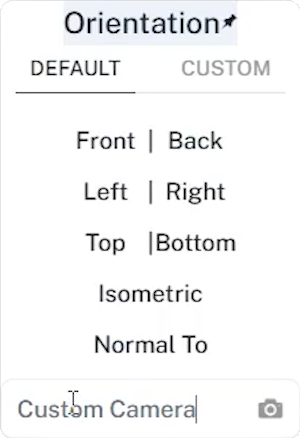
Press the Spacebar to open the orientation menu, position the camera as required, give the camera a name, and click Save.
Custom cameras are stored in the Custom tab. From here, they can be applied to any step in the project. You can also update or delete custom cameras at any time, making it easy to refine your standard views as a project evolves.
Applying cameras to multiple steps

Once a camera is set, either as a custom camera or a manually positioned view, you can apply it to multiple steps at once.
Open the Step Manager, select the steps you want to update, and then click Update with Current Camera View. This saves the current camera orientation to all selected steps, ensuring a consistent viewpoint.
Using update and propagate
When you want the same camera angle to continue across several steps, Cadasio provides the Update and Propagate option.
With the desired step active, position the camera as needed and choose Update and Propagate from the top menu. This applies the camera to the current step and automatically propagates it to all future steps that do not already have their own camera properties saved.
This approach is ideal for long sequences where the viewpoint should remain unchanged unless explicitly overridden.
Create clearer presentations with consistent cameras
By resetting step cameras, creating reusable custom views, and applying or propagating camera positions across steps, you can keep your Cadasio projects visually consistent and easy to follow.
These techniques help ensure your instructions flow smoothly and maintain a polished, professional appearance from start to finish.