In Cadasio, custom 2D toolbox items allow you to reuse labels, icons, symbols, and other markup elements across projects, helping you maintain consistent branding and reduce repetitive setup work.
This guide explains how to create your own 2D toolbox items and how to update them when your styles change.
Why use custom 2D toolbox items?
Custom toolbox items are ideal for any markup you use regularly, such as standard labels, warnings, callouts, or branded icons. By saving these elements to the toolbox, you ensure they look the same in every project and can be added with a single click.
Creating a custom 2D toolbox item

Creating a 2D toolbox item starts by designing the element exactly as you want it to appear.
Begin by adding the required 2D elements to your project. This could be a label, icon, or combination of shapes and text. In this example, a label is created and customised.
You can adjust the label’s shape style and colour, as well as the leader line and its anchor point. Text formatting can be refined using the flyout toolbar, where you can control font, size, weight, and colour to ensure the text stands out clearly against the background.
If the element includes text, you can choose between fixed text or dynamic content. Fixed text is useful for standard labels or warnings, while Meta Properties allow the text to update automatically based on the object it is attached to. For example, inserting a part number property ensures the label always effects the correct data.
Once the element looks correct, select it and click Create New Toolbox Item from the Toolbox tab. A dialogue will appear where you can name the new item.
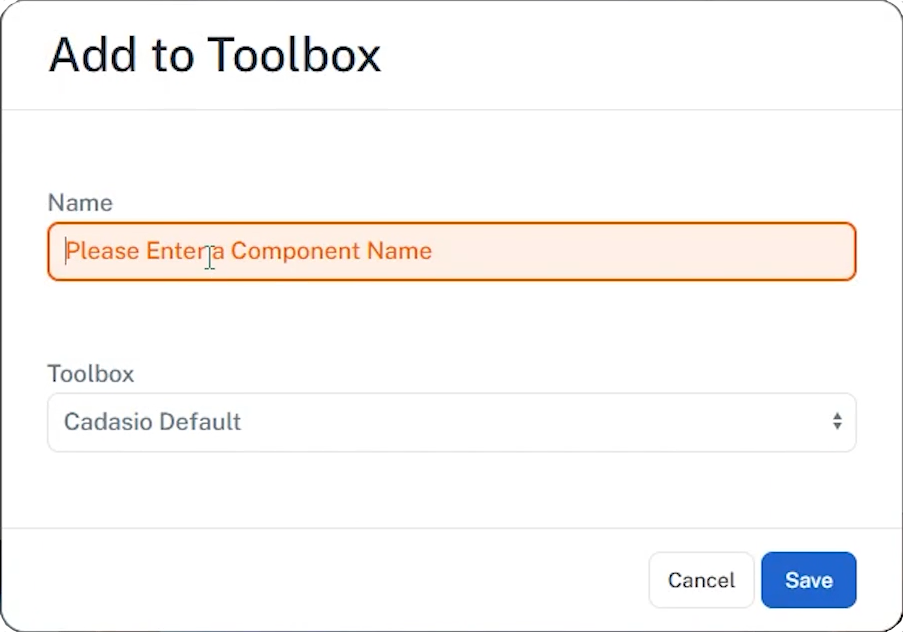
Next, choose where to store it. You can save items to your default toolbox, but many teams prefer to create a dedicated company toolbox. This can be created directly from the dropdown by selecting Create New and entering a name.
After saving, the new toolbox item becomes available for use in any project.
Updating an existing 2D toolbox item
Toolbox items can be updated at any time if your styling or branding changes.
To update an item, start by modifying an existing instance in a project. For example, you might change the label colour or adjust the text styling.
Once the changes are made, click Update Toolbox Definition in the Toolbox tab. This saves the updated design as the new default for future use.
At this stage, you will notice that other instances of the same toolbox item in the project remain unchanged. This is intentional and prevents unintended updates.
Updating existing instances
If you want existing instances to match the updated toolbox definition, select all instances of the item. This can be done manually or by selecting one instance and pressing forward slash to select all matching items.
With all instances selected, use Reload from Toolbox in the Toolbox tab. This updates the selected items to match the latest toolbox definition.
Managing toolbox items
Toolbox items can be managed from both the Designer and the Dashboard. You can delete items you no longer need, and this will not affect existing projects. However, deleted items will no longer be available to add to new projects.
Build consistent projects faster
Custom 2D toolbox items are a fast, reusable way to maintain clean, consistent visuals across all your Cadasio projects. By creating and updating them effectively, you reduce setup time and ensure every project follows the same visual standards.