Links allow you to control an object’s position and visibility, navigate steps, and link to external url’s and other Cadasio projects.
Each project that you create has a default navigation overlay at the bottom of the screen. This navigation is an easy-to-use interface for users to progress through a project, but sometimes you may want customised buttons to match your company style and branding. When this is the case, the default navigation overlay can be turned off to make way for a custom navigation using links.
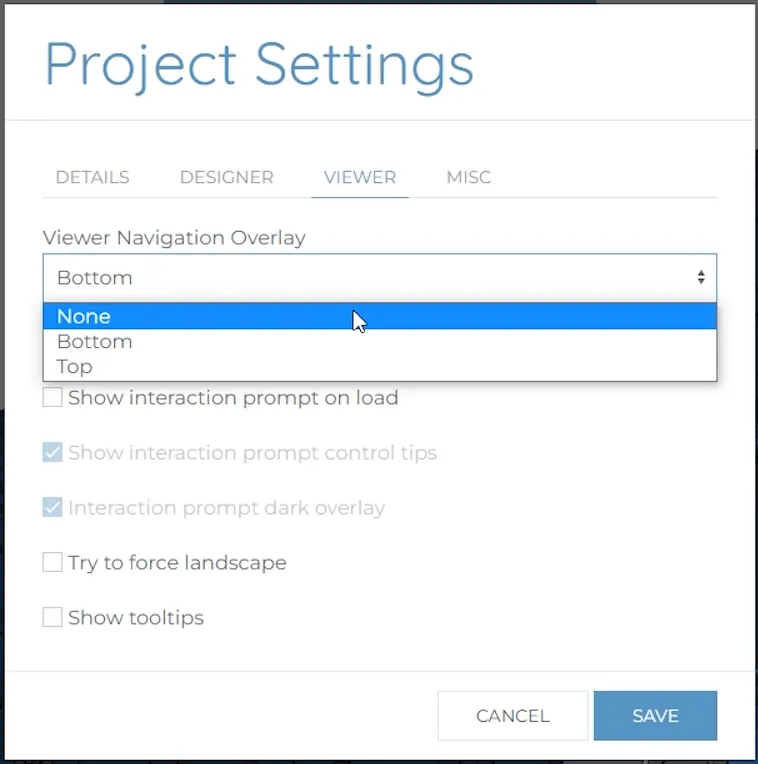
To turn the navigation overlay off, go to the Tools slide out menu and click project settings. On the viewer tab there is an option for viewer navigation overlay. If you set this to none, the navigation will no longer be visible within the viewer.
When creating a custom navigation, images are generally used as the buttons. Custom images can be added to Cadasio or you can pick from the pre-existing images from within the Cadasio library.
Moving forward and backward through steps is fundamental so let’s look at how to add a link in to achieve this.
Let’s start by adding a back button. I want a link that will activate when the user clicks the image. To add a link, select an object, head to the general tab, and click link. A new dialogue box will appear.
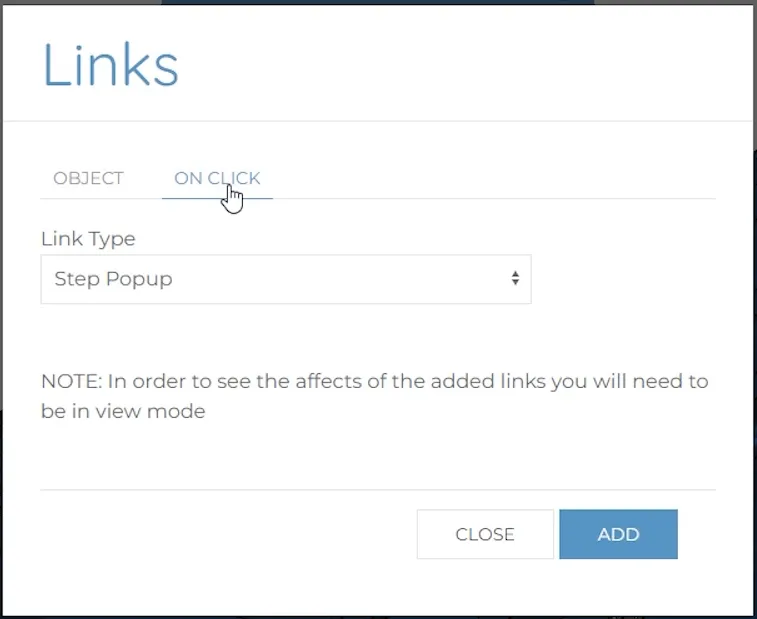
Click on the Onclick tab. There are several different On Click link types that can be added.
Navigation - linking around the project you are in.
URL - opens a website, either in this or a new browser tab.
Project Step - used to go to a particular step in the current project, or a step in another project.
Visibility - allows you to toggle whether items are hidden or shown
Step Popup - displays an overlay on the step such as an image, video, pdf or text box.
Step Description - displays the steps description as an overlay.

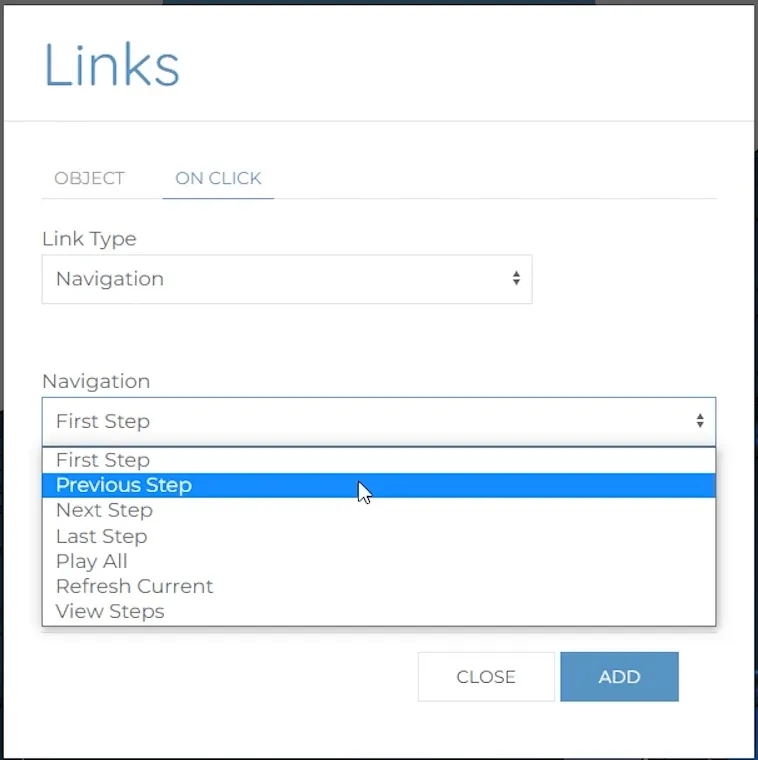
As the back button I am adding needs to navigate me around the current project, I’ll choose Navigation from the link type drop-down.
Using a navigation link, I can link to the first or last step, previous or next step, refresh the current step or even view all steps. Select previous step and click Add.
It’scommon to need a home button within a project that takes the user back to the firststep whenever they click on it. With an image selected, click link from thegeneral tab.
From the On Click tab, Under Link Type choose navigation and then first step and click Add.
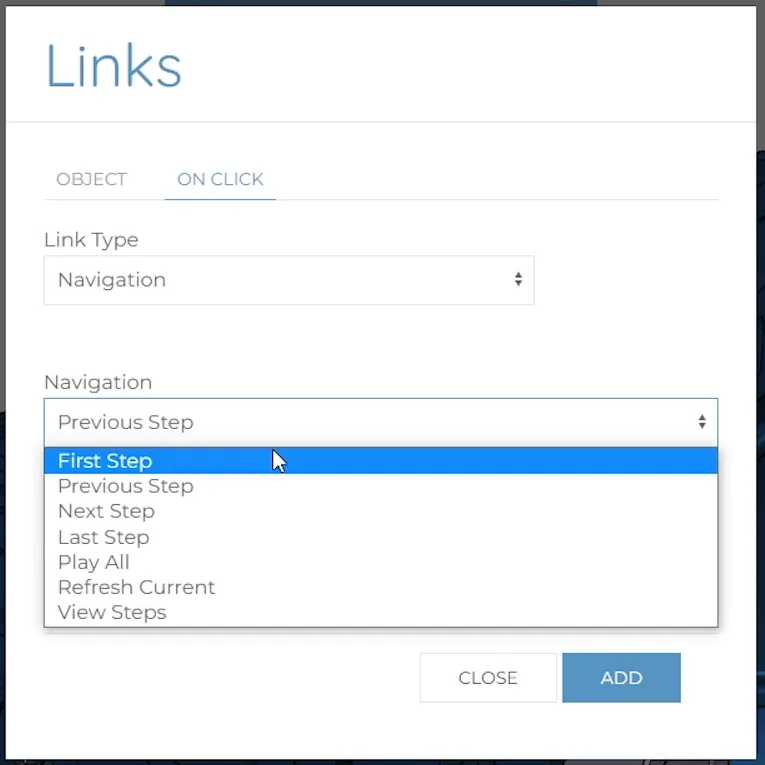
Using ‘first step’ rather than choosing a specific step means the home button will always navigate back to the first step that exists even if the project’s steps are reordered.
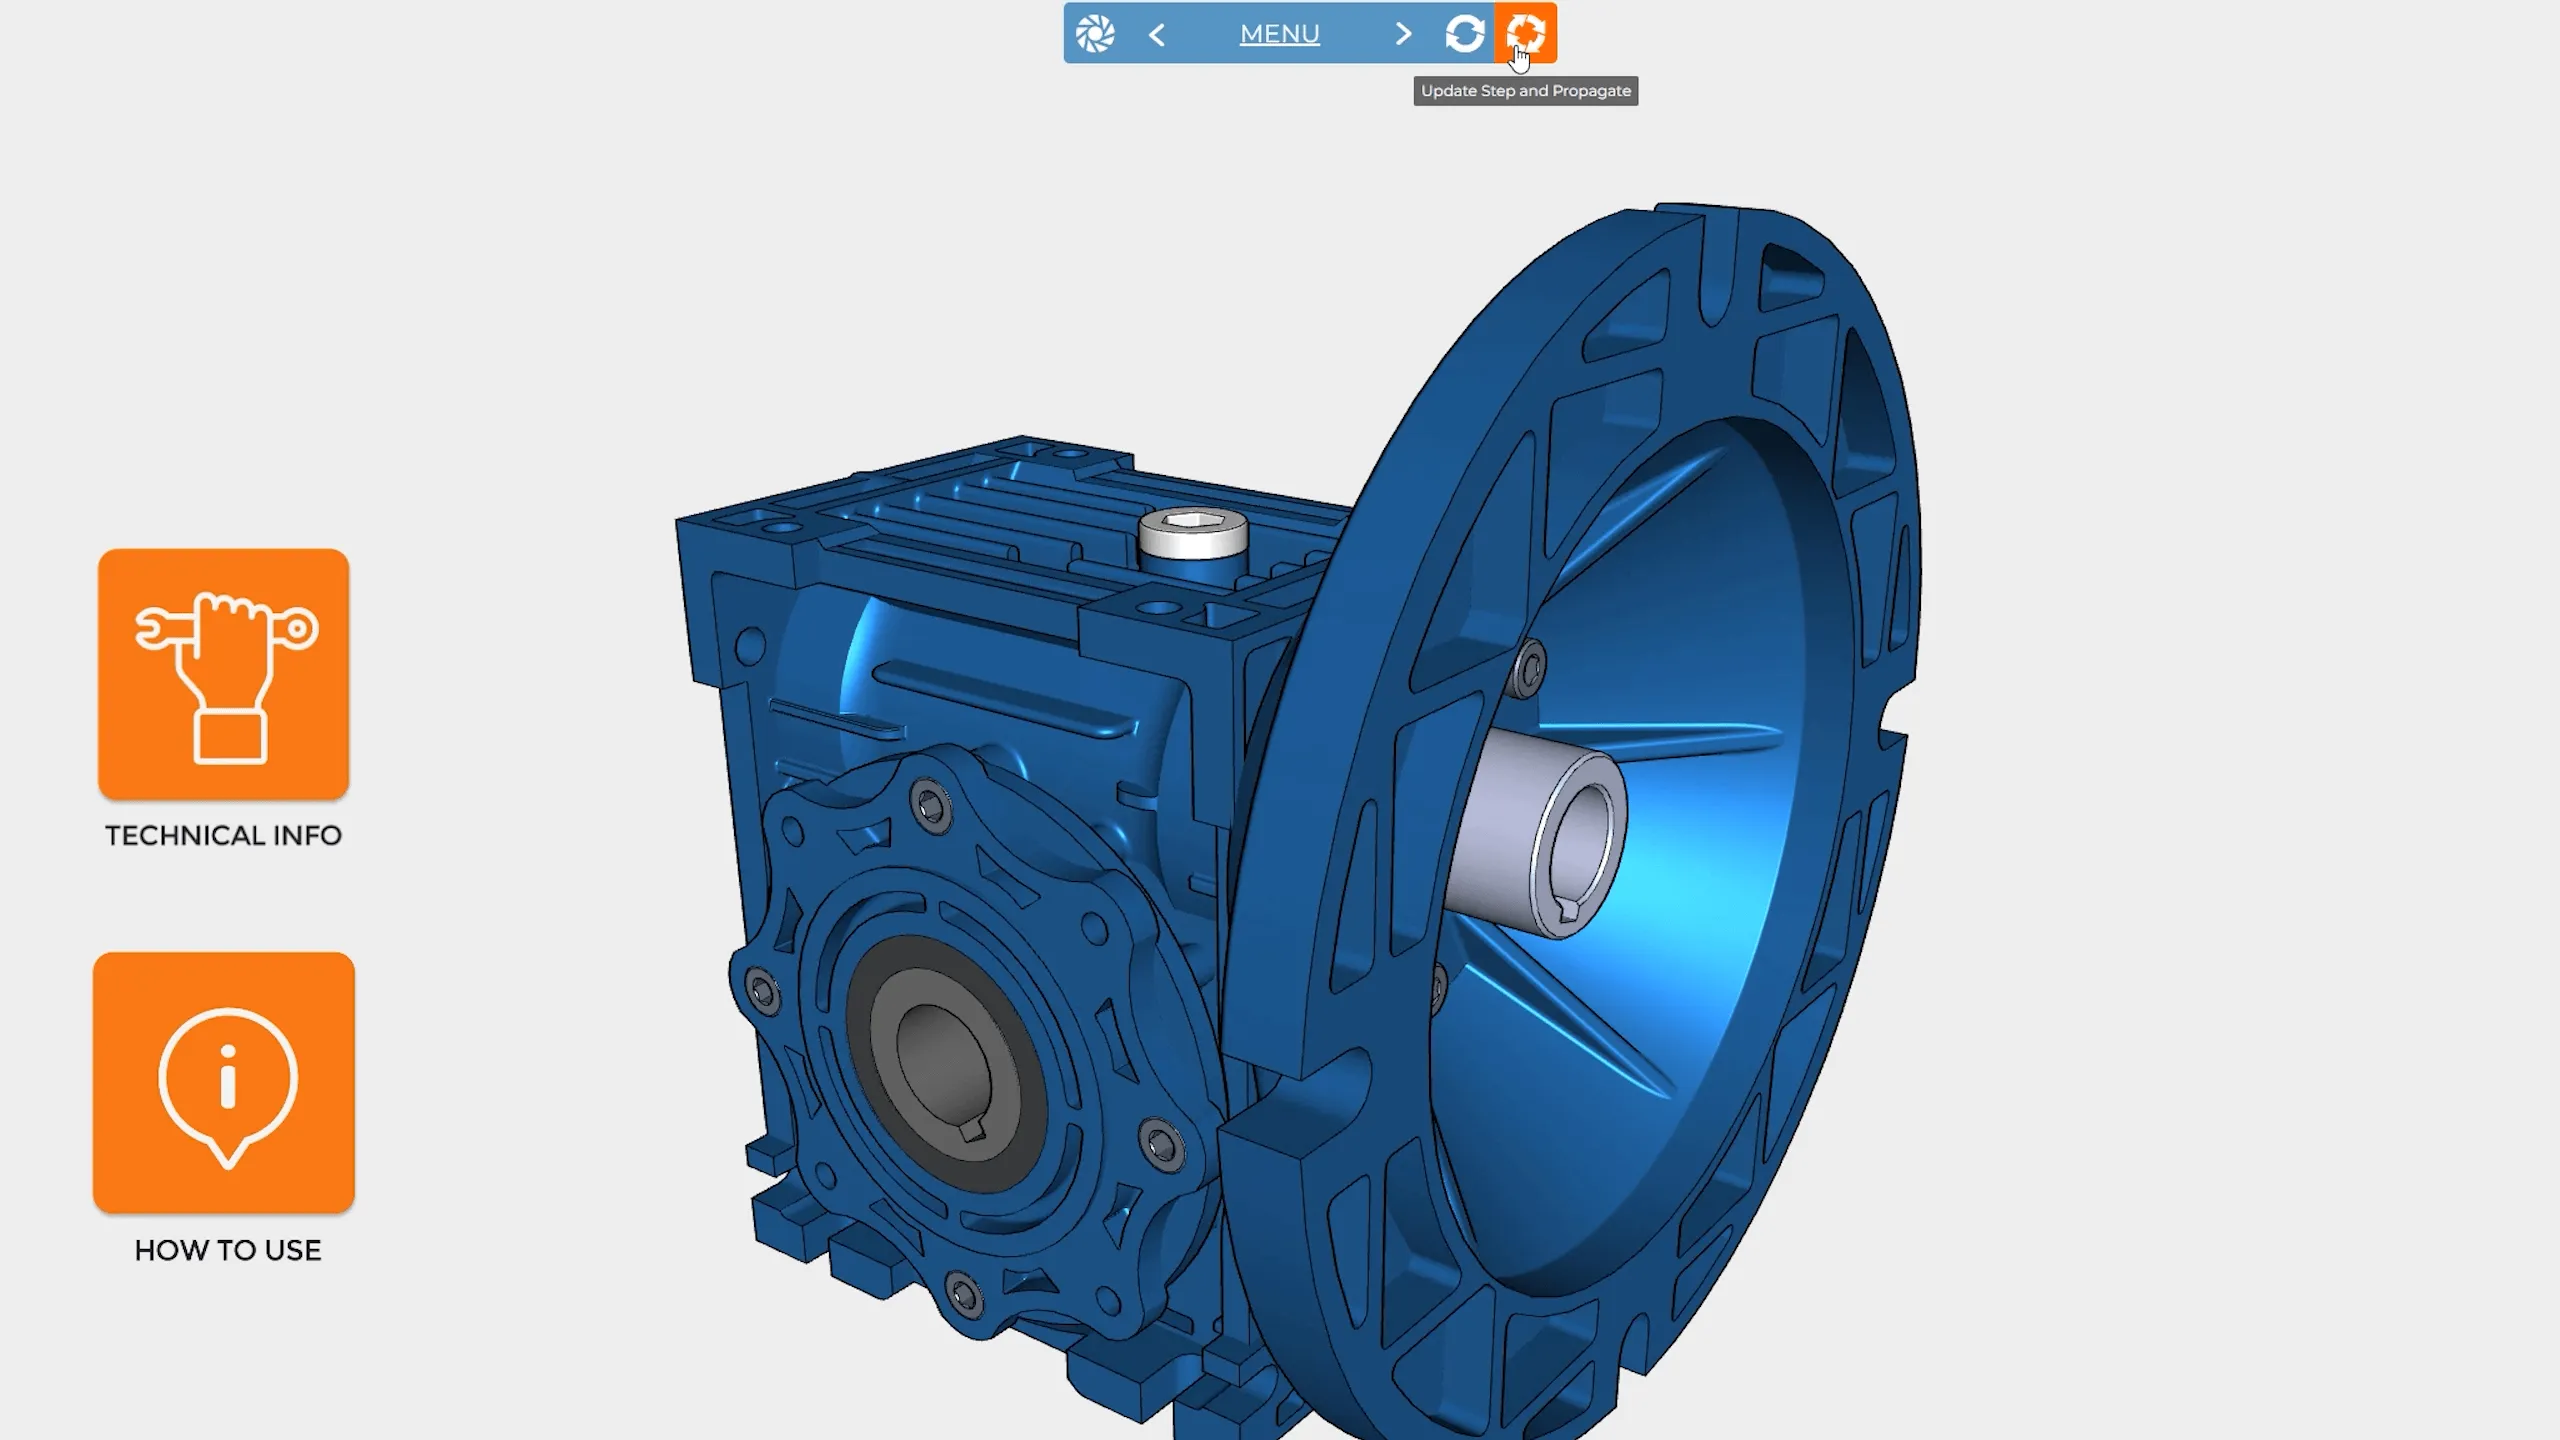
To make sure these links exist in all my steps, I’ll update and propagate the changes.
You can’t test links out whilst in the designer but if you toggle to the viewer by pressing V, you can see the links in action.
Links Types
Moving forward and backward and to a projects first step are common navigational requirements. It is possible to link to specific steps though too.
With an object selected, click link from the general tab.
From the On Click tab, Under Link Type choose project step.
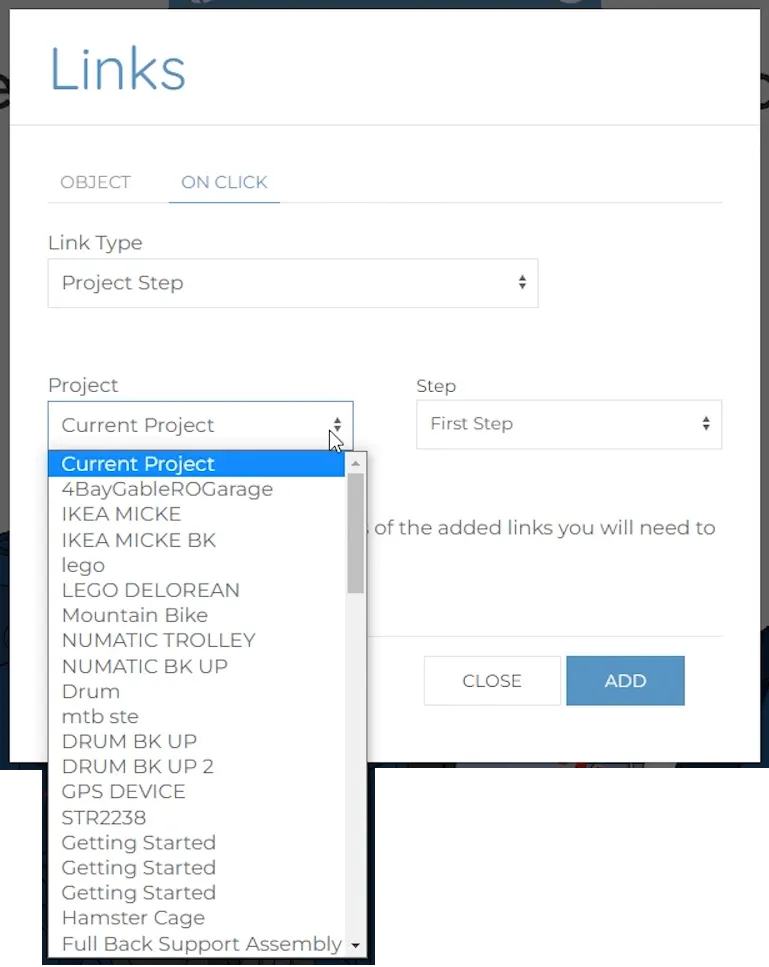
The project drop-down now allows you to selected either the current project or any other projects you have access to. This is really useful if you have common procedures that exist across multiple products or you want to break down a big assembly into more manageable chunks
From the step dropdown, any step can then be selected to link to.