Model Preparation
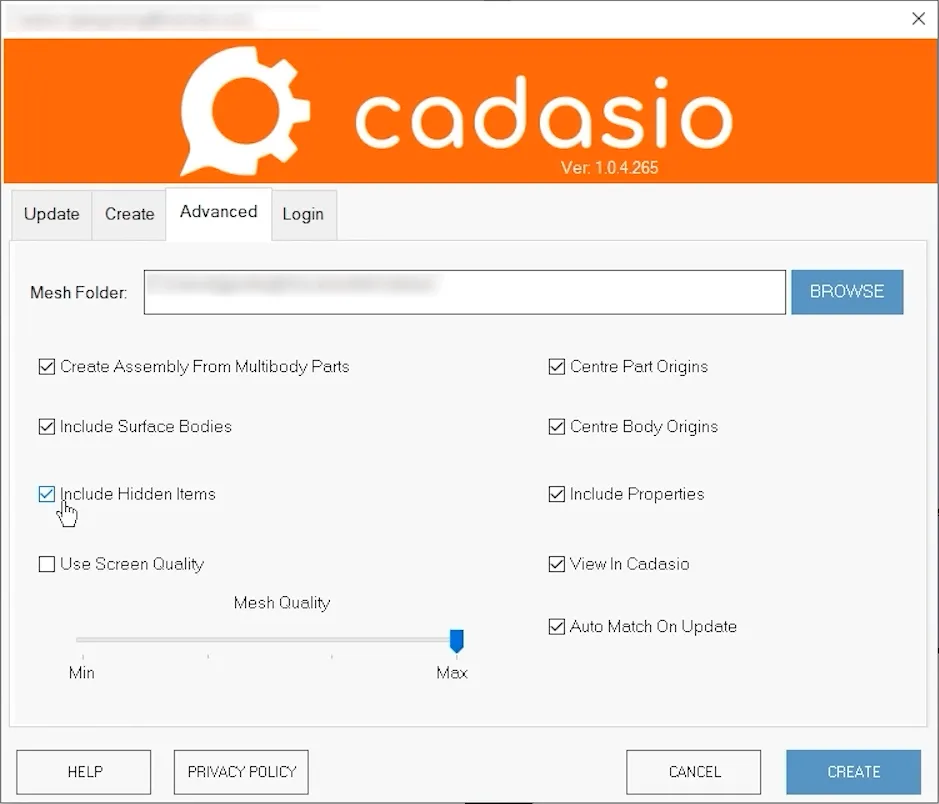
Preparing your model within your cad system is a great place to start before uploading to Cadasio. If you have parts that aren’t required for the assembly instructions, these can be removed, suppressed or hidden. If you choose to hide your components, just make sure that ‘include hidden components’ is unticked in the Cadasio addin options.
There are a few benefits to excluding unrequired parts. Firstly, it reduces the size of your Cadasio project, resulting in performance benefits. Secondly, having fewer cad objects makes manipulating your project much simpler, allowing you to build the project quicker.
Disassemble
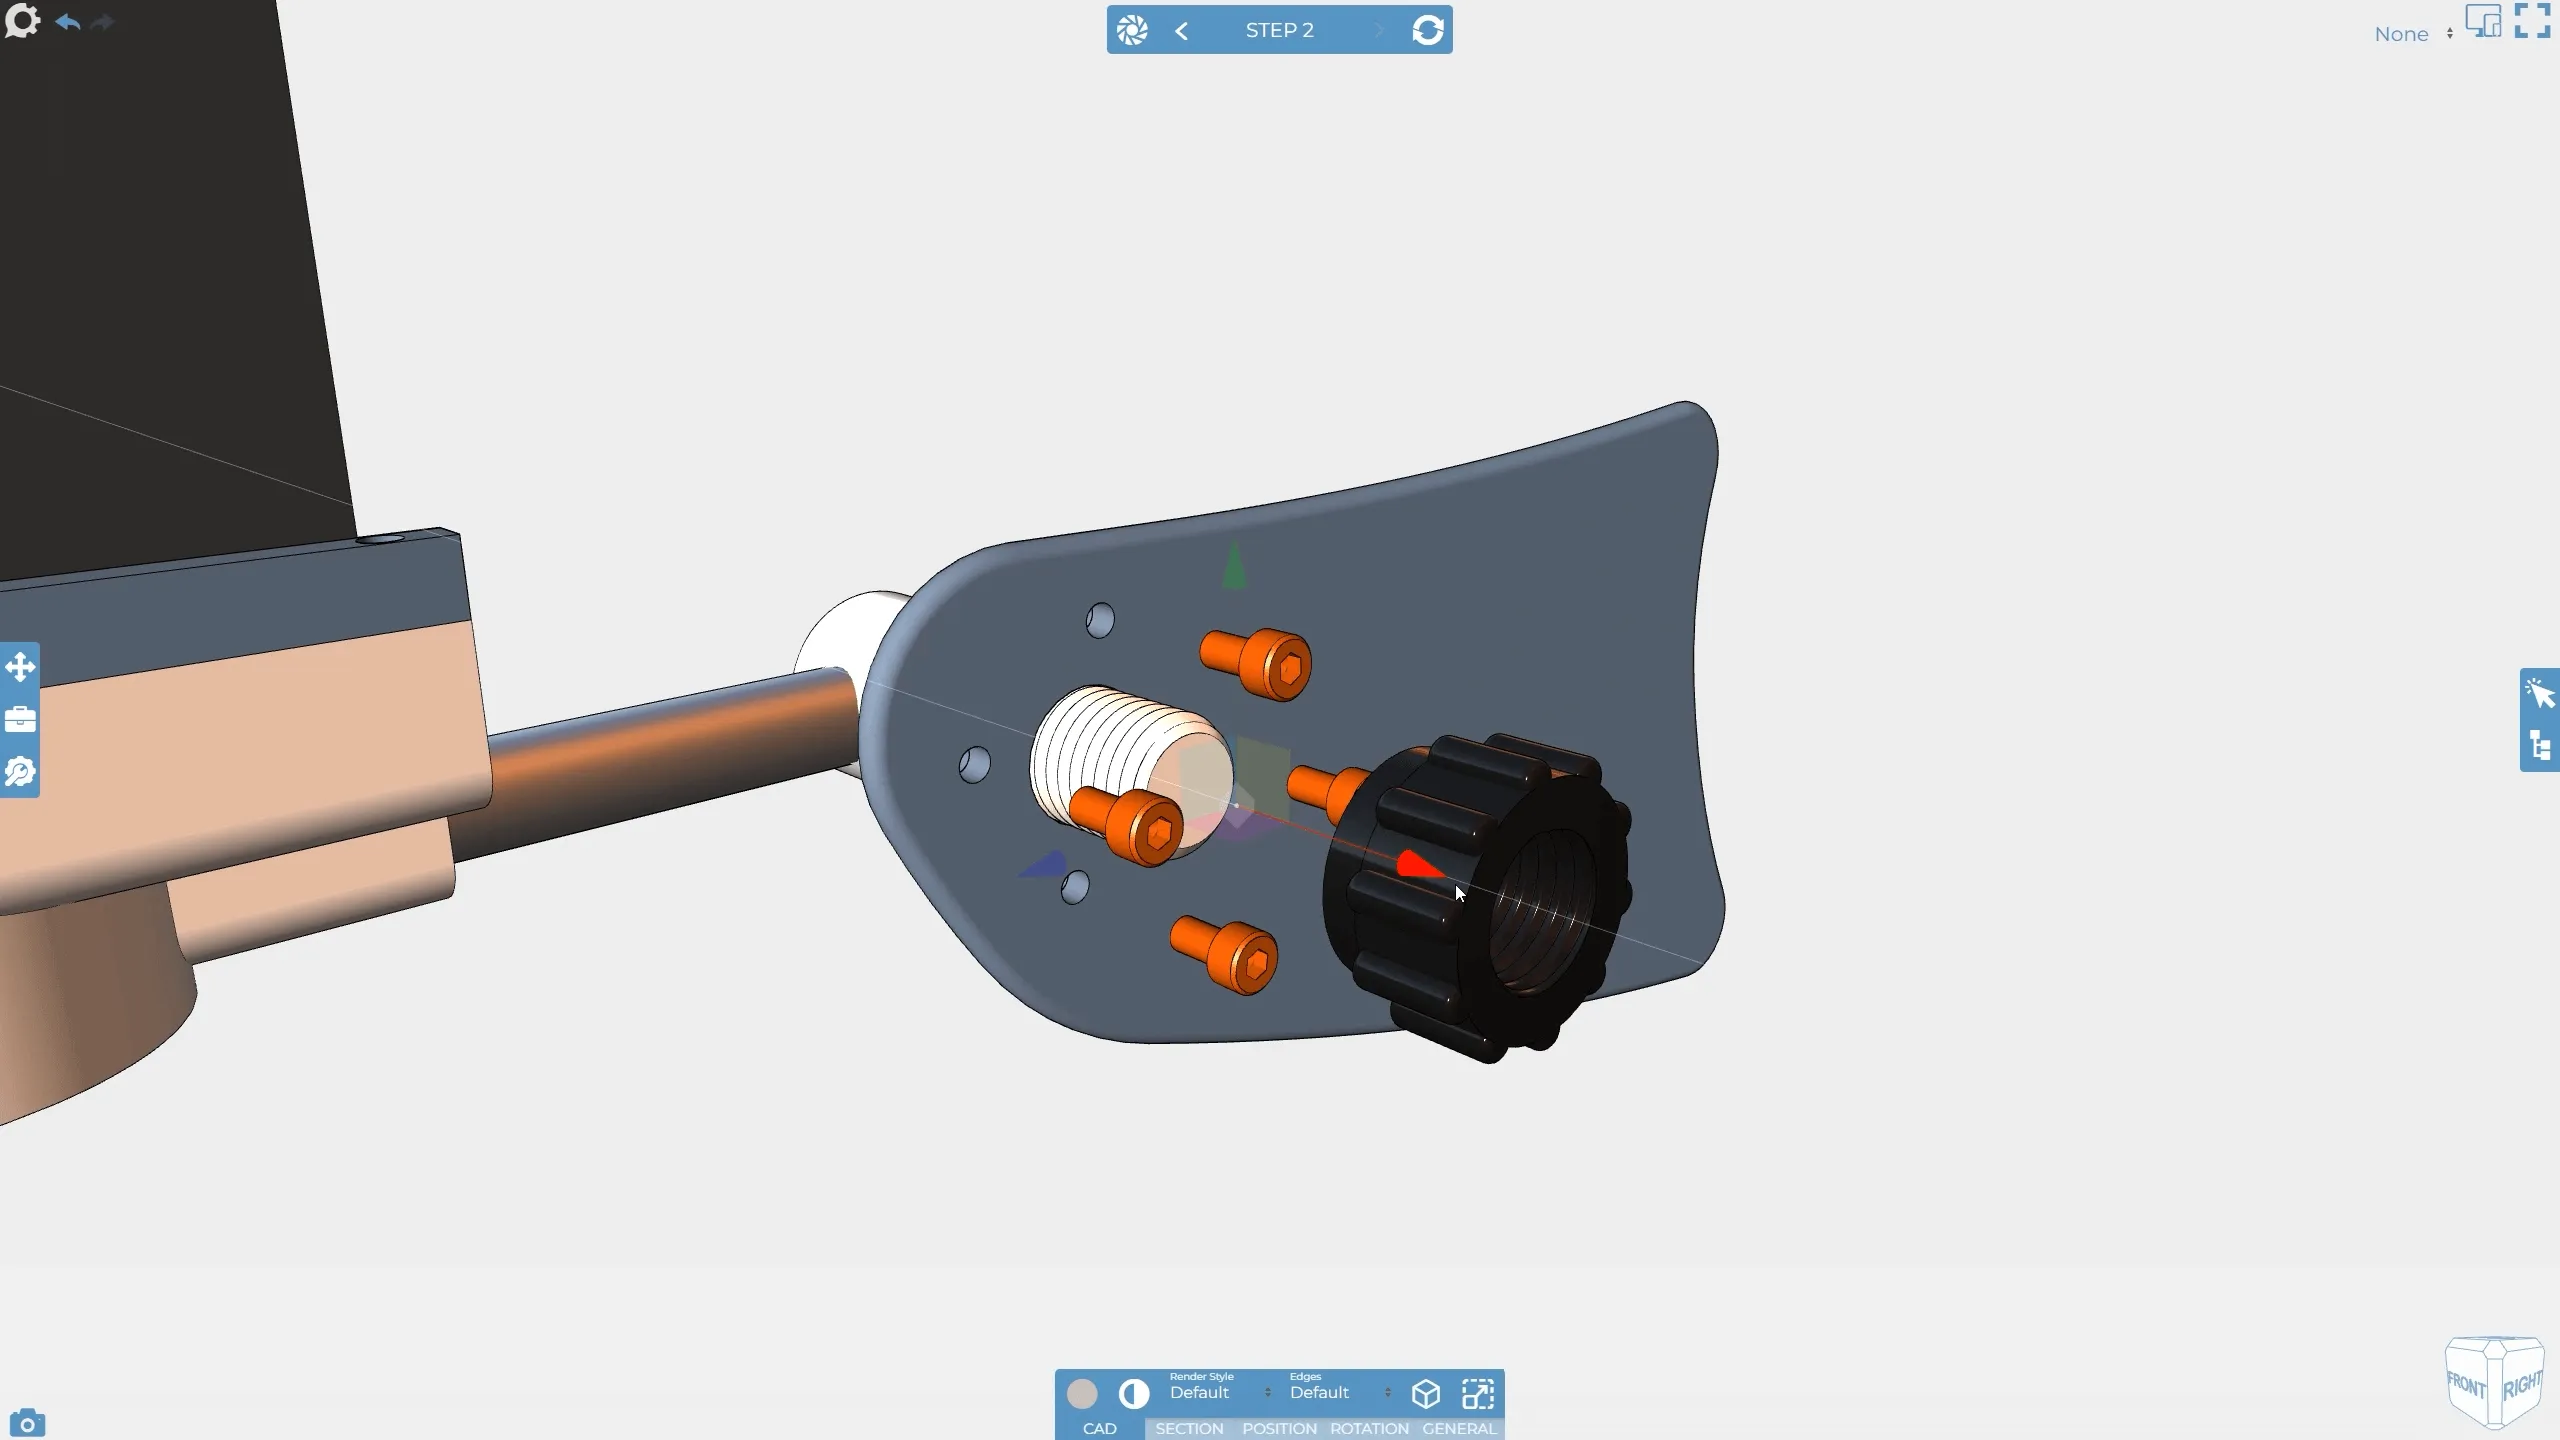
Assemblies are usually imported fully assembled into Cadasio, with all of the components visible and in the correct position. When creating assembly instructions, it is generally easiest and quickest to work backwards and show your product being disassembled. This is because it is a lot easier to hide parts that you can see, than it is to show parts that you can’t see.
When positioning 3D objects, you may want to consider how the camera is going to be orientated but you don’t need to worry about this too much at this stage, as we can come back and adjust the camera once the 2D objects have also been added.
Reverse
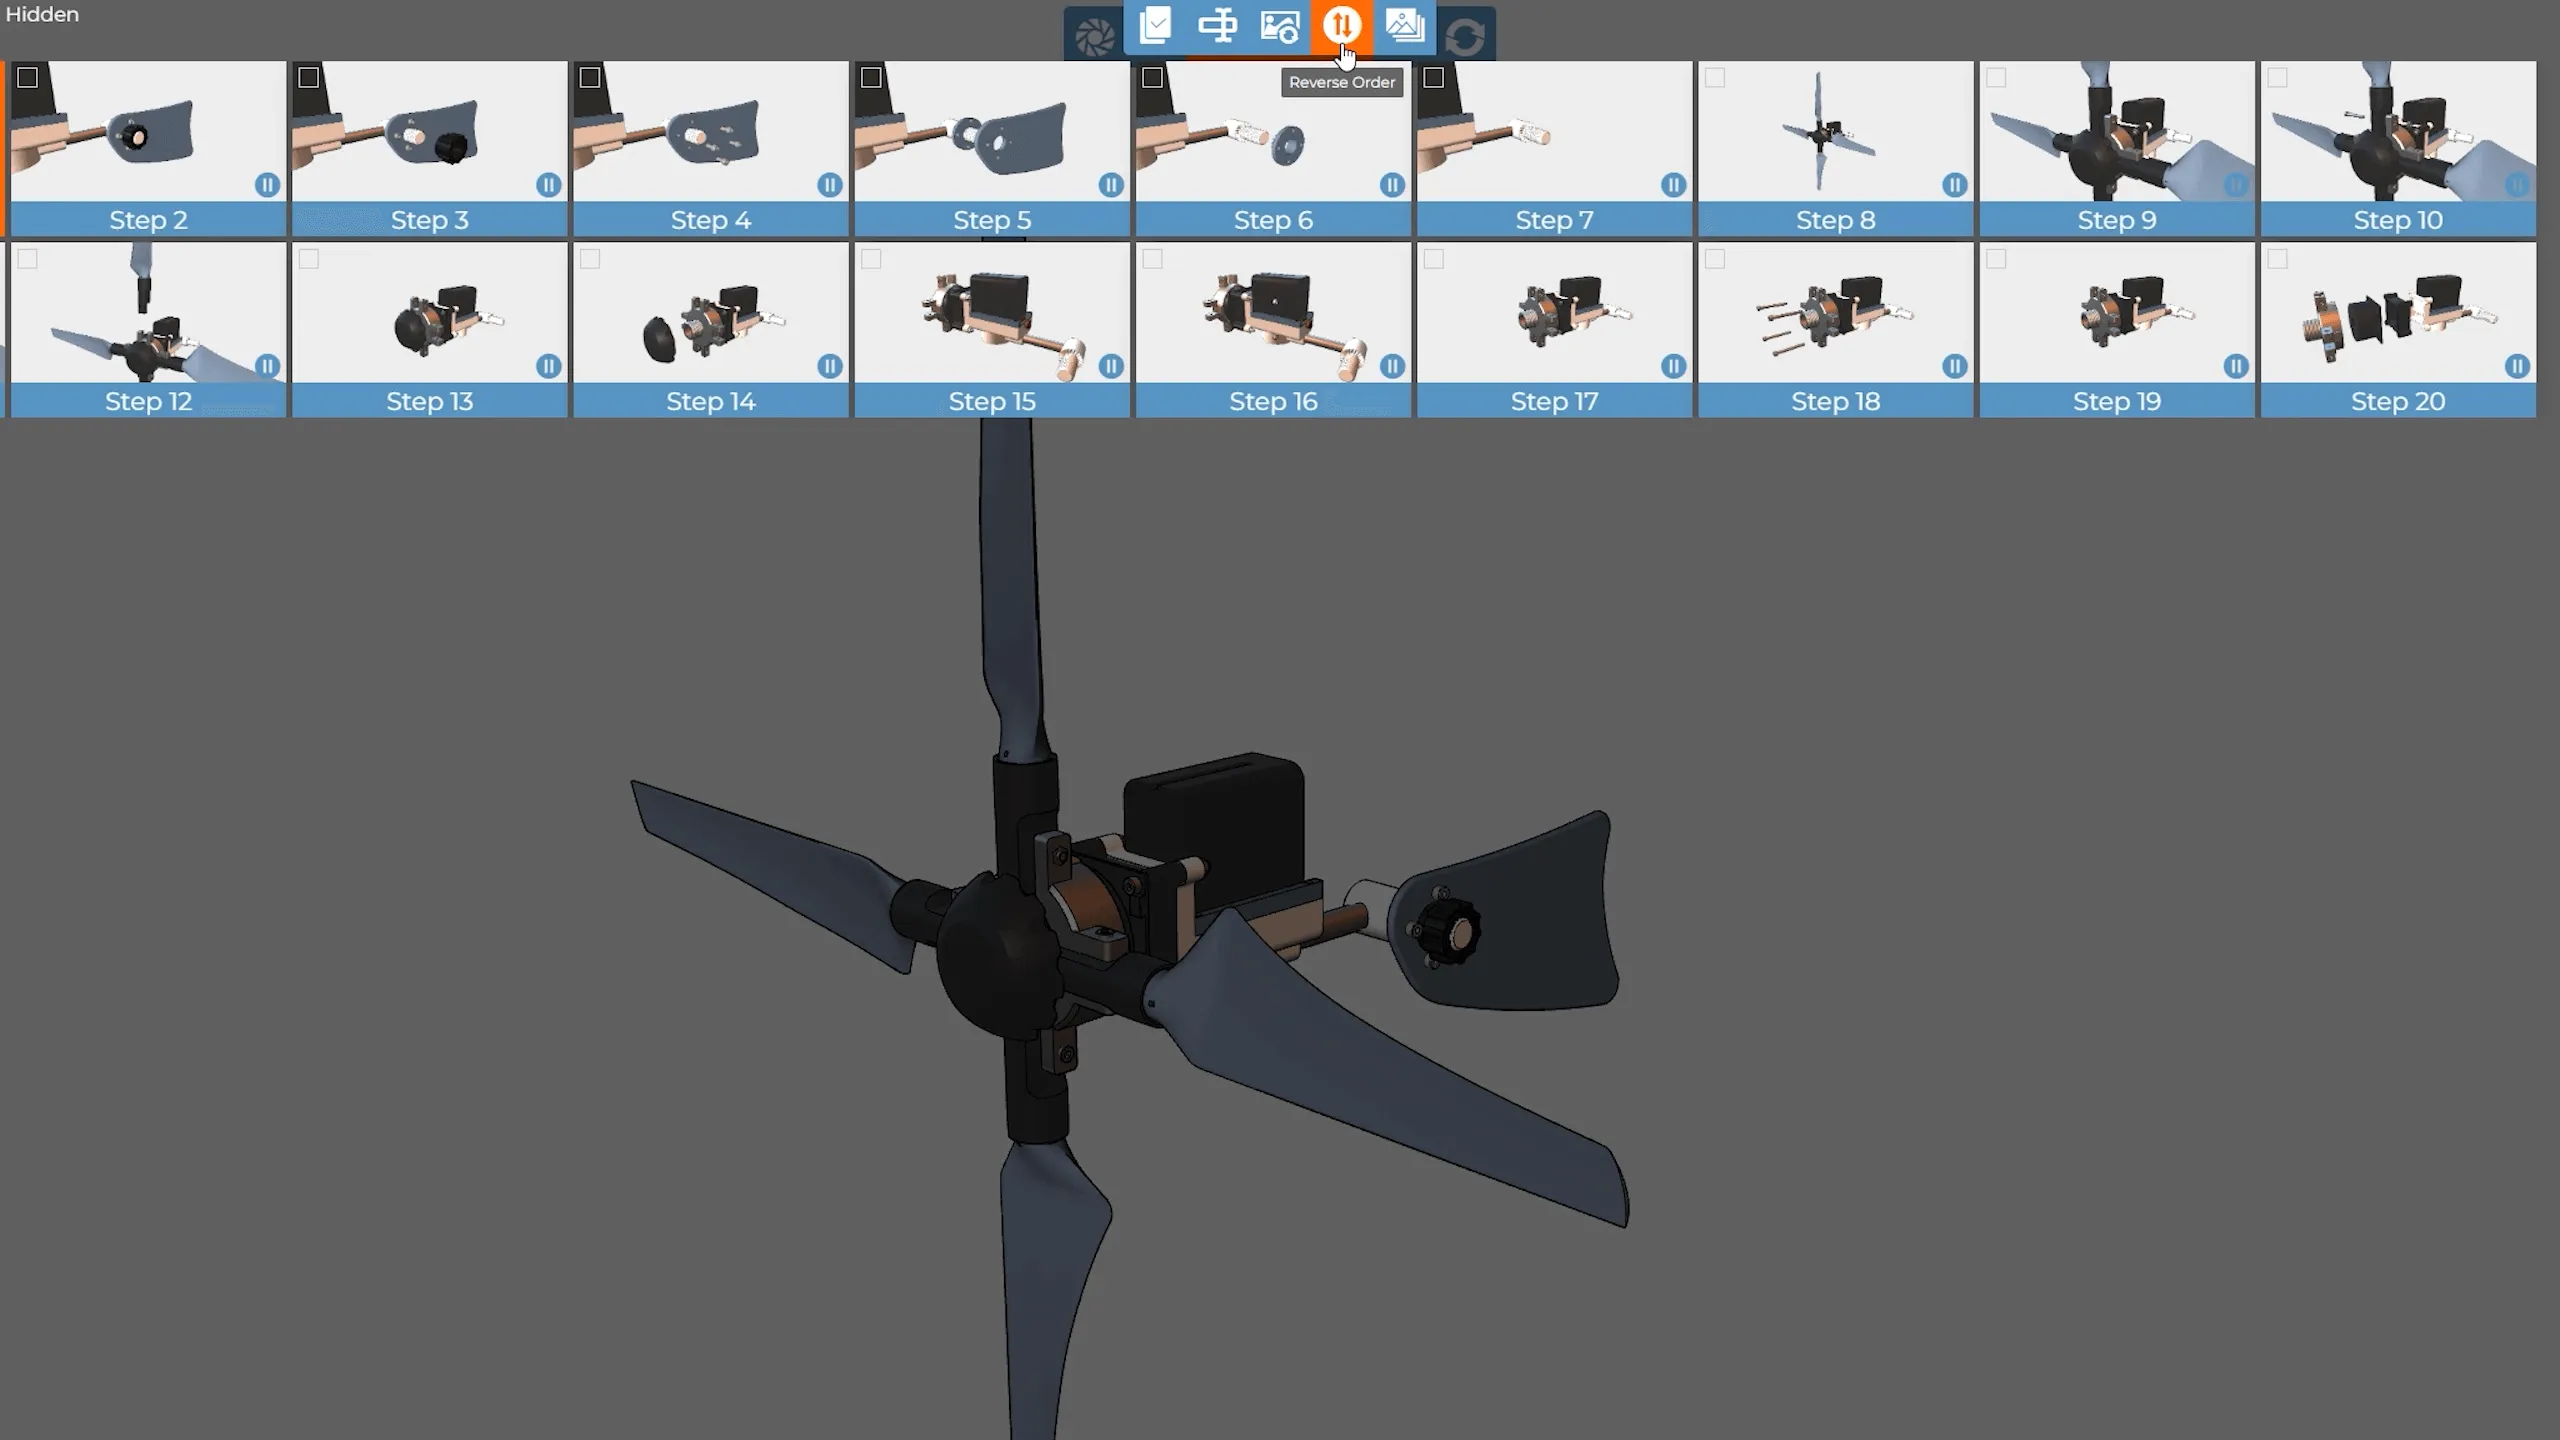
Once all off your steps have been created, albeit the wrong way round, you can then reverse your steps so that you now have the product being assembled, rather than coming apart. Check out our reordering steps video for more information on some of the tools available when doing this.
Add Toolbox Items
You can add a variety of secondary markup to your projects to help explain your assembly procedures, and once your 3D objects are in place, it’s time to start adding this in.
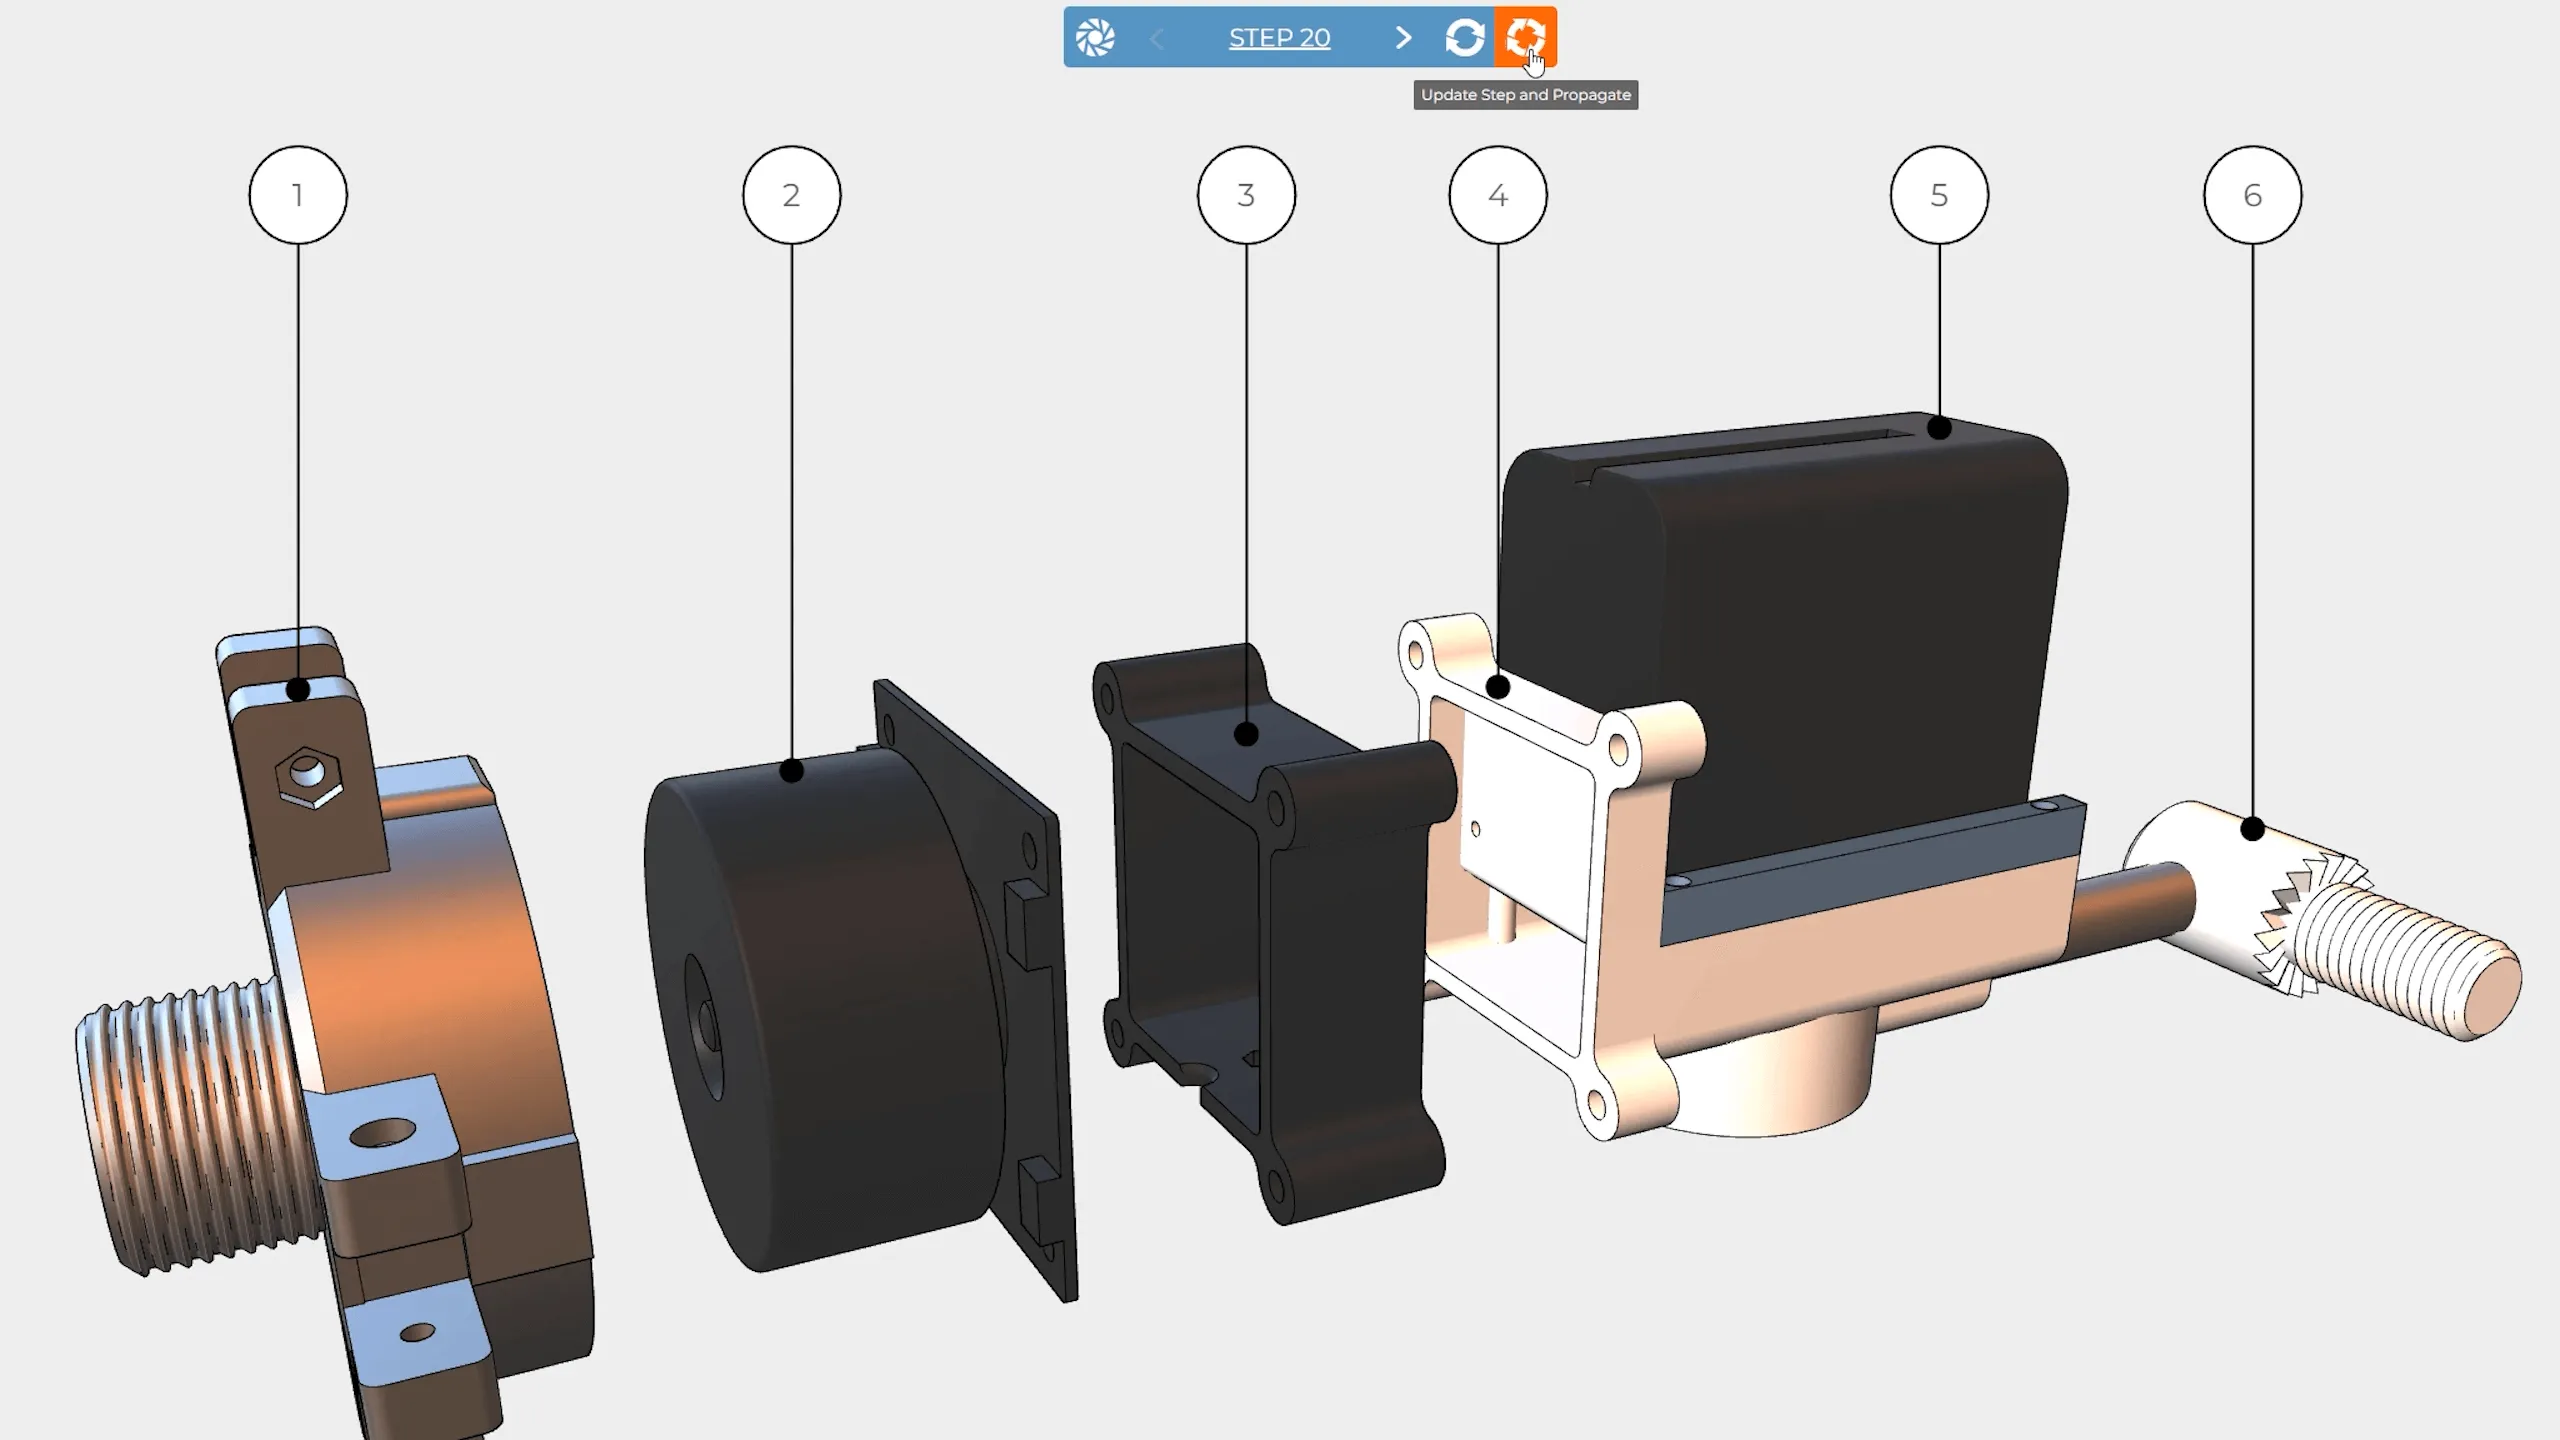
A good tip whilst doing this is to use the restore camera position tool, shortcut key C, so you don’t need to worry about messing up your view whilst adding items. Making changes to steps will require that step to be updated to save the changes.
There are two options when updating a step;
- The standard update which will only affect the current step.
- And Update and propagate, which can also affect future steps.
Both of these options are covered in more details in our ‘updating steps’ quick tip video.
Reuse 2D Markup
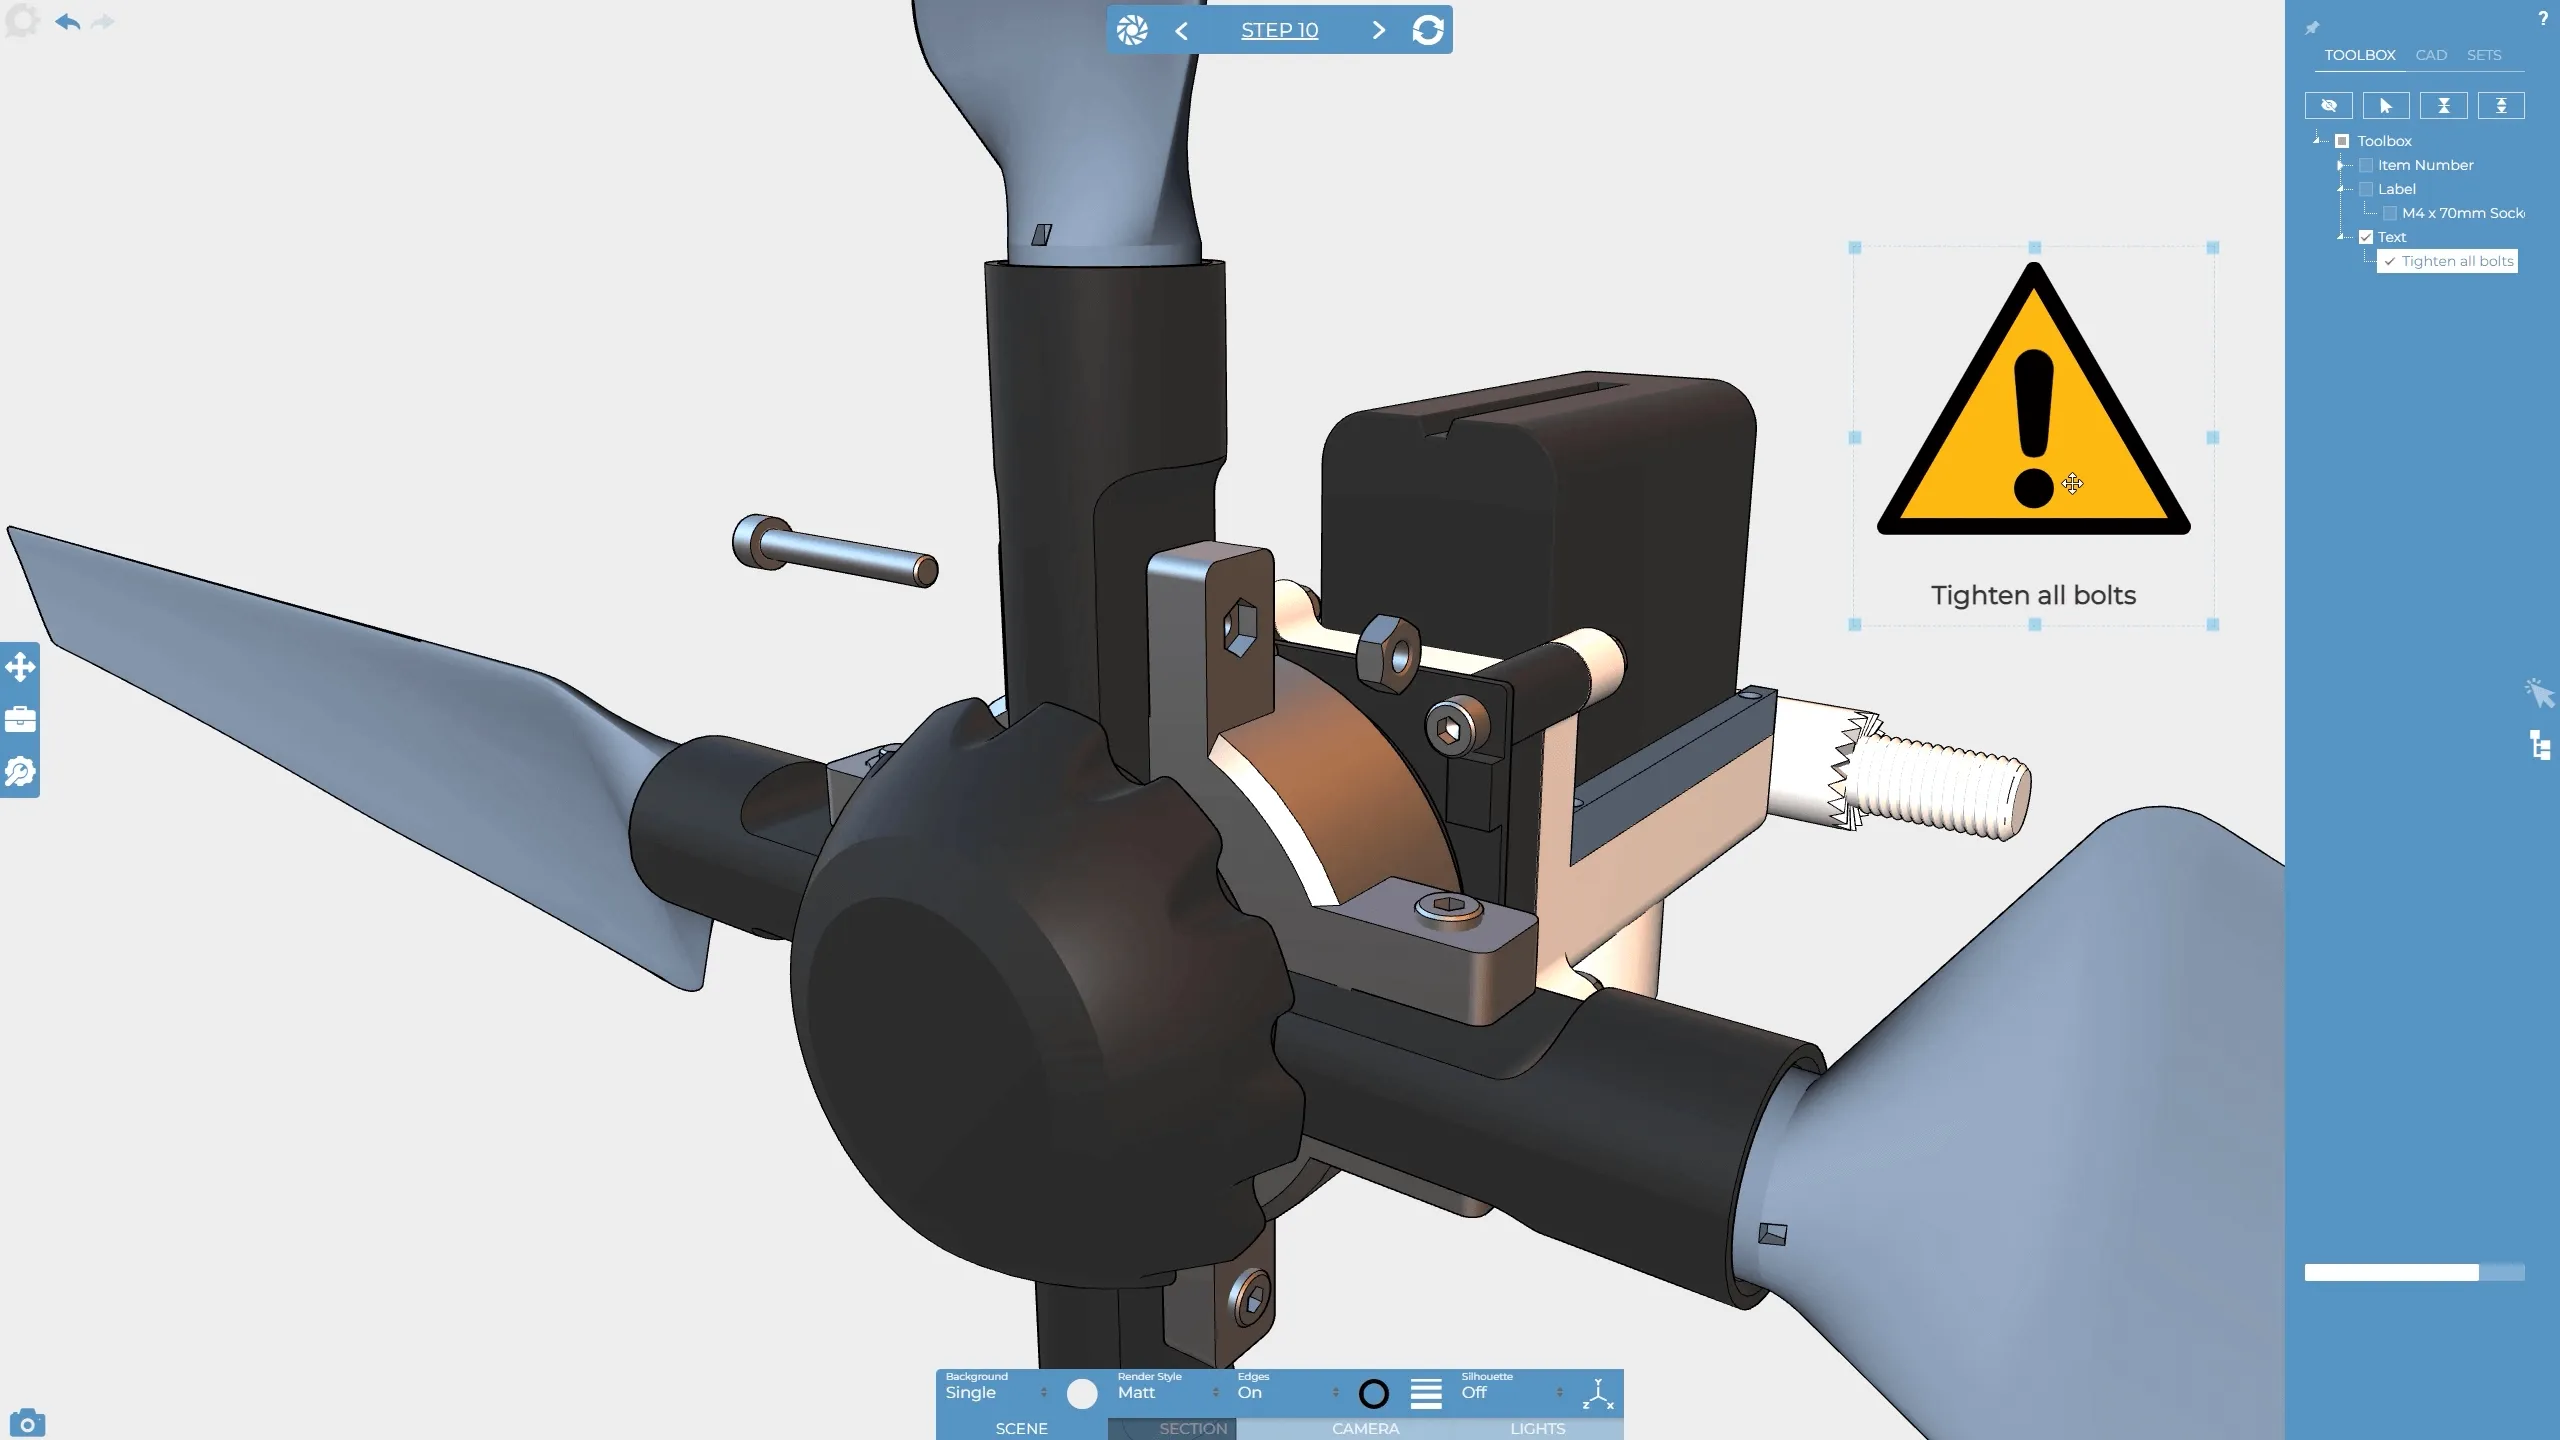
When you add 2D markup to a project, such as a text box, label or item number, they can be reused across multiple steps. All of the markup's properties can be modified across steps, such as the information displayed, the colour, position and size. The benefit to reusing the same markup's multiple times is that it reduces the overall amount of markup within your project and makes it easier to manage.
In order to reuse an existing markup in another step, go to the Selection Trees flyout menu, and click on the Toolbox tab. All of the markup that has been added to the project will be listed and from here you can show the required markup.
Camera
Once all of the 3D and 2D is in place I would then go through the steps and confirm the camera still looks as you want it to. You may want to tweak it once you see everything in place, or you may want to ensure consistency by using the update with current camera tool.
The update with current camera tool is located within the steps manager and allows you to use the camera view from the step you are currently on across other steps.

Devices
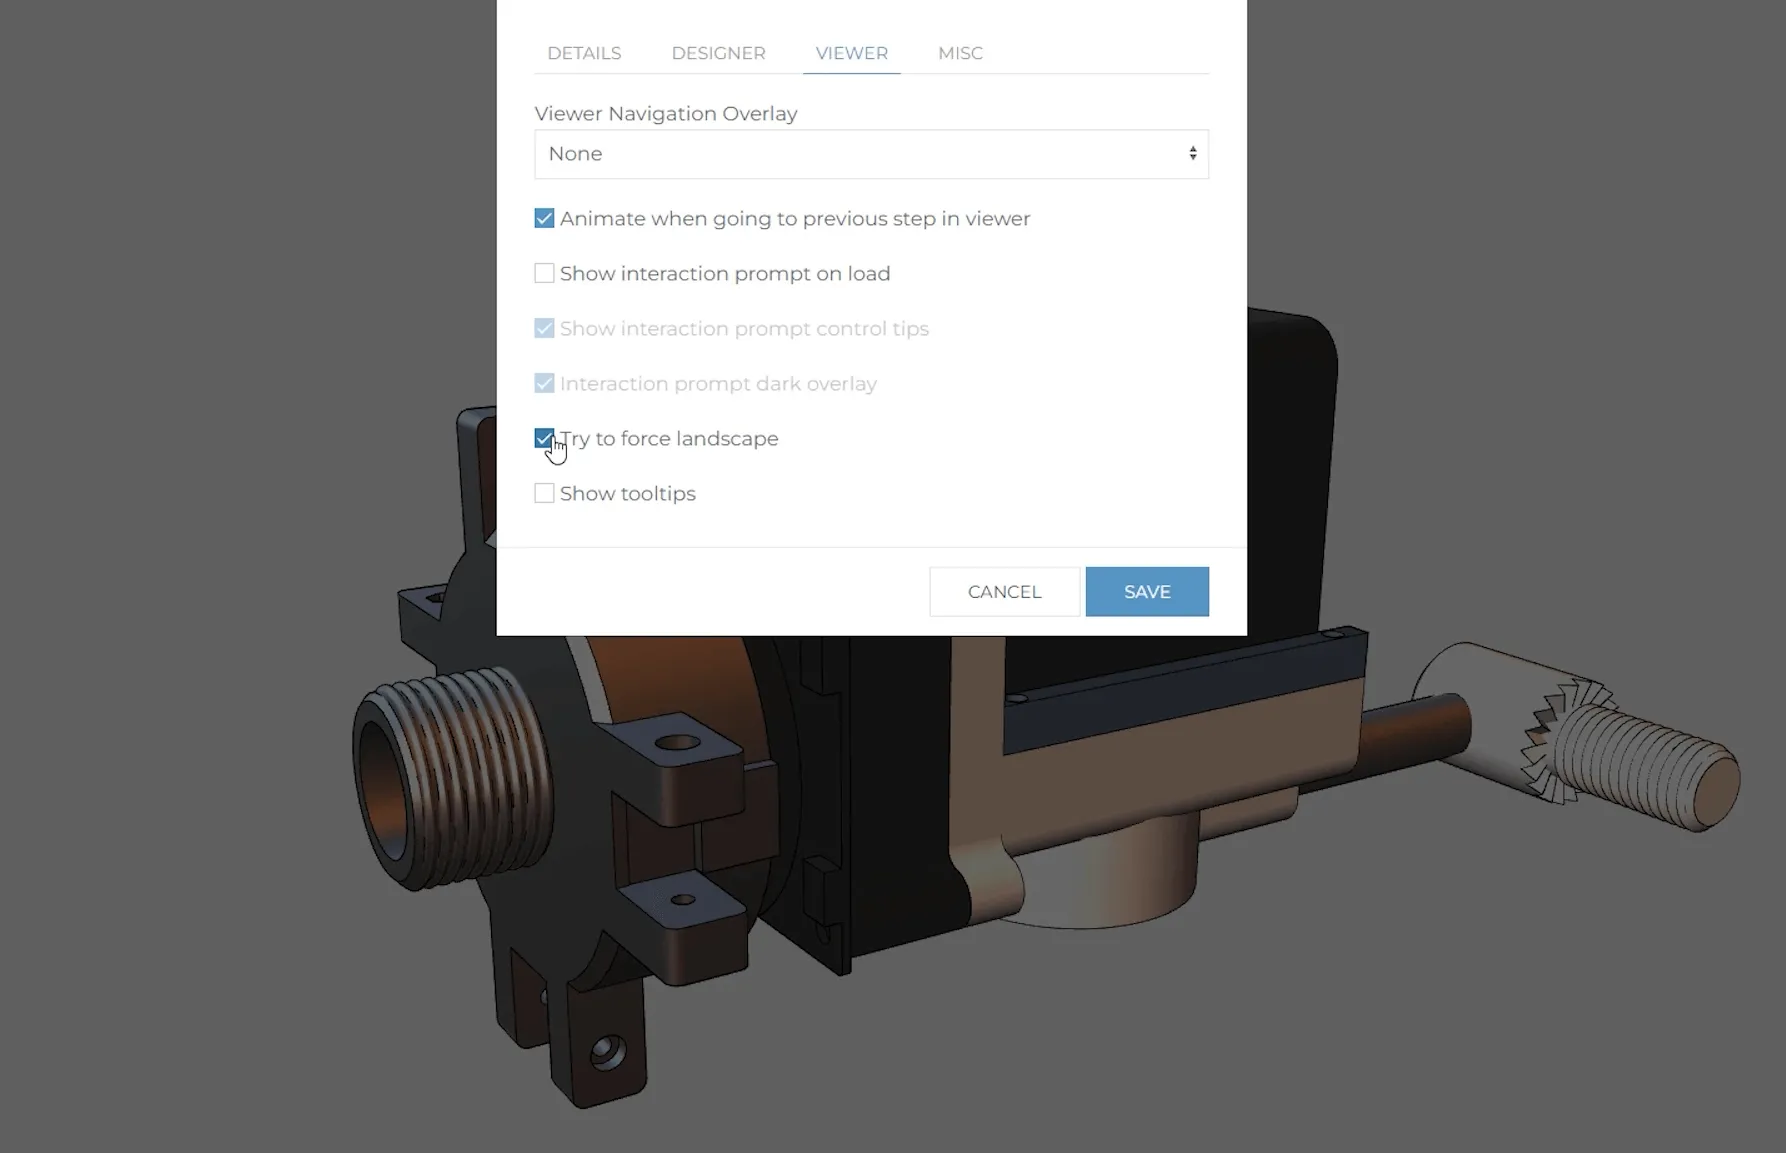
The final best practice suggestion is to leave setting devices until everything else is finalised. Generally, when setting devices there shouldn’t be too much that needs to be changed and most of the time you will find yourself changing some camera positions and maybe adjusting markup positions, therefore if all of your objects, markup and cameras are set first, there will be less to adjust within the devices.
Another good tip when setting devices is to enable the option to try and force the viewer to landscape orientation. This option can be found from the Tools flyout menu, under project settings, on the viewer tab.