Breadcrumbs
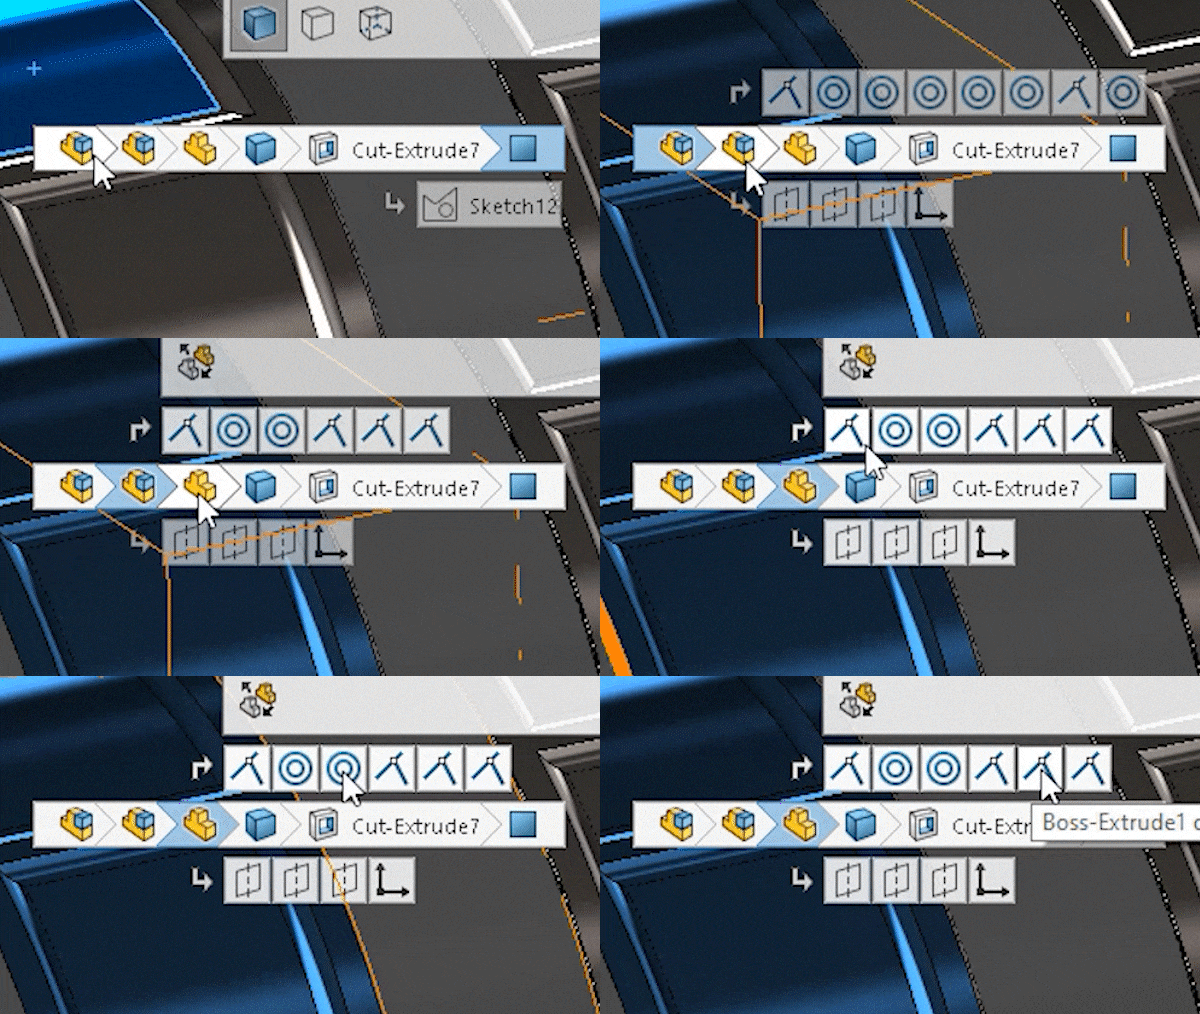
Selecting the correct level in an assembly tree isn’t always straightforward, and often requires drilling down through multiple sub-assemblies. To speed this process up, you can make use of breadcrumbs.
Selection breadcrumbs are a context-based view of the current selection. You can easily select assemblies, parts, bodies, features and faces, as well as planes, and mates.
To prompt breadcrumbs, click on any entity on the model. Depending on which options you have set, the breadcrumbs will either appear in the top left hand corner of the viewport or by your cursor.

If breadcrumbs aren’t appearing for you, or you want to change where they appear, they can be controlled from the display menu under system options.
Alt-Drag Mates
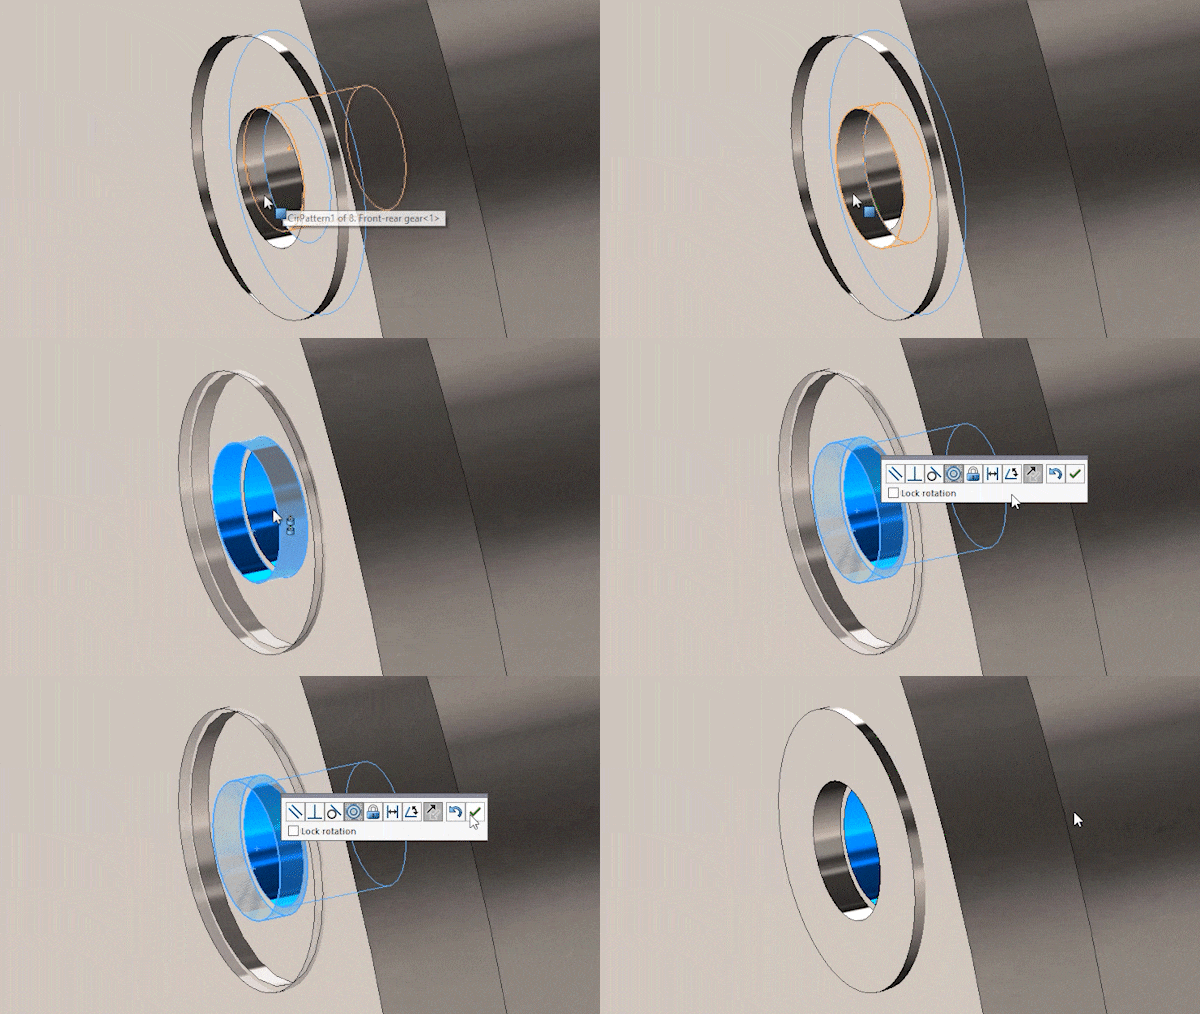
Mates are one of the most commonly used features within assembly modelling so any time that can be saved whilst adding them in can really reduce design time. For the common mate types, such as coincident, parallel and concentric, the Alt key can be used to quickly drag a component into place and add a mate at the same time. Hold the Alt key, click on a face of a component, and drag it to the face of another component in order to add the mate in.
Quick Mates
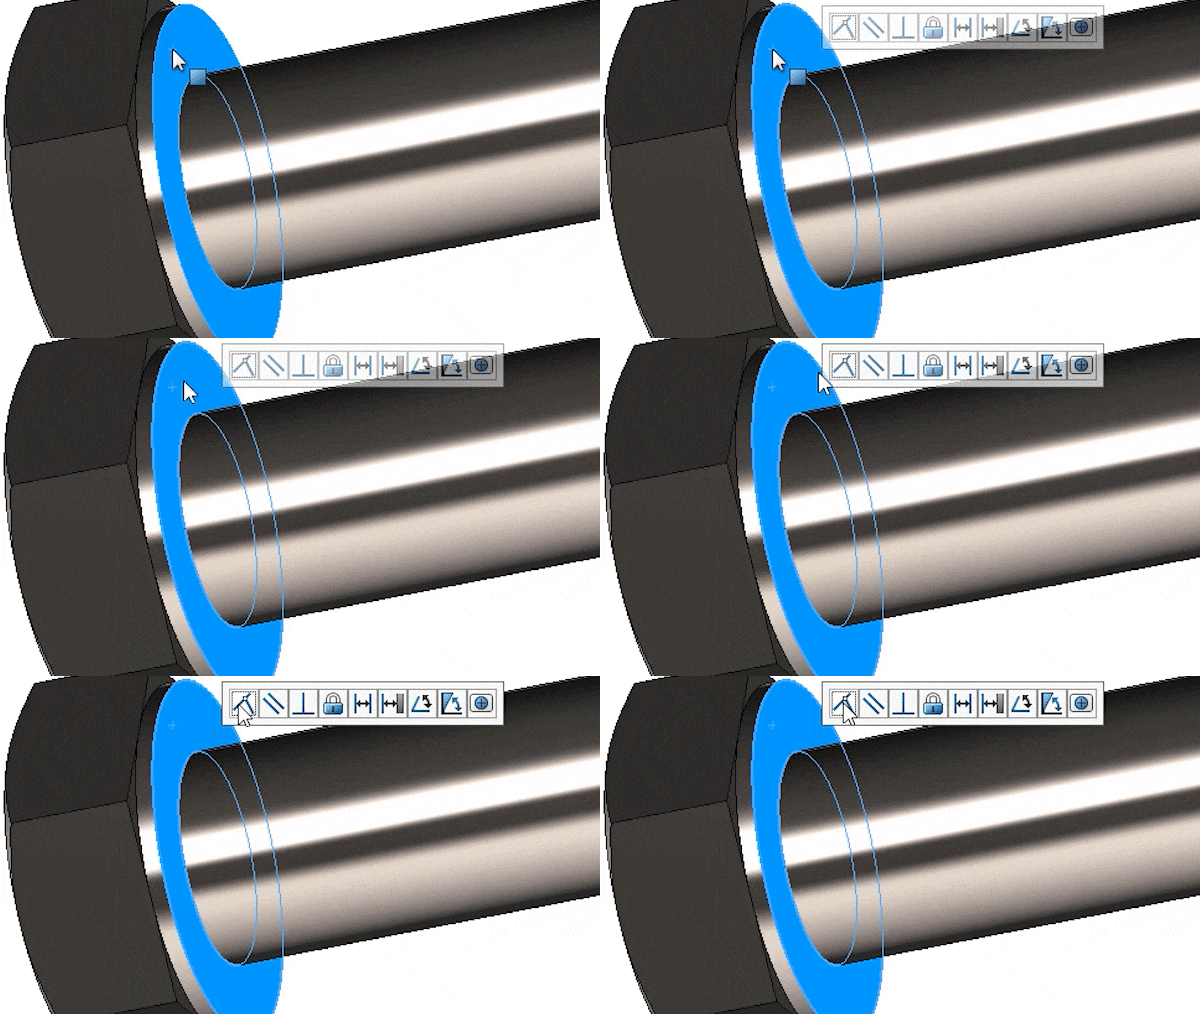
Quick mates are another great way to efficiently add mates. To access quick mates, multi select any entities that you would like to mate between whilst holding the Ctrl key, and the quick mates menu will appear by your cursor. Clicking the required mate from the quick mates popup will add this in without having to go into the full mate dialogue.

If you’re not seeing the quick mates menu appear, check that it is enabled from the Tools > Customize menu.
Multi-Mate
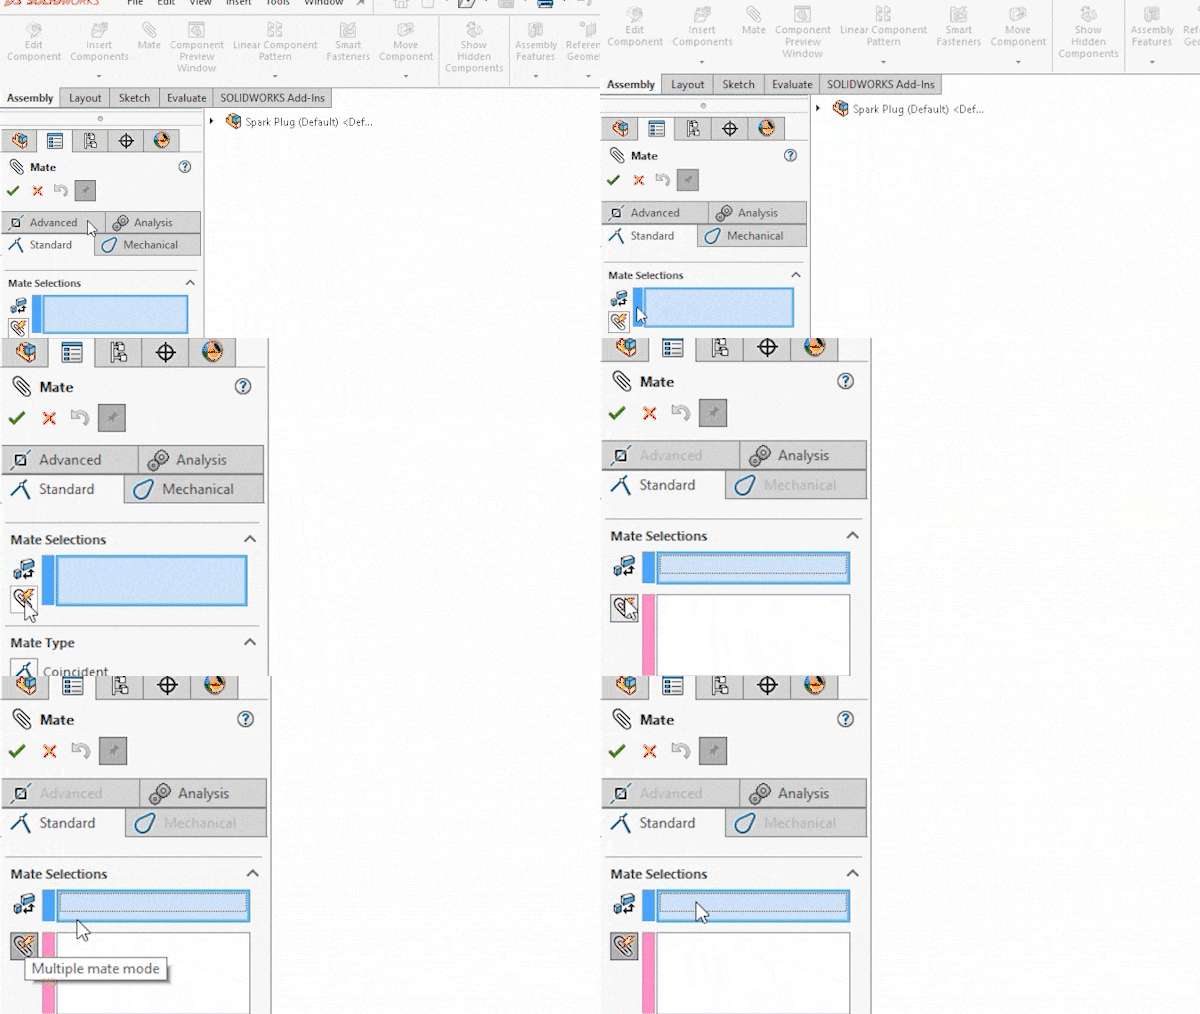
It can be extremely common to need to add multiple mates back to the same reference, across different components? This can be especially true when working with cylindrical geometry. Multi-mate speeds this process up, by allowing a single common reference, and multiple component references across different parts.
In the main mate dialogue, click the multi-mate button to the left of the mate input box. The common reference is selected in the first input box. Multiple different references can be input into the second box.
Select Other
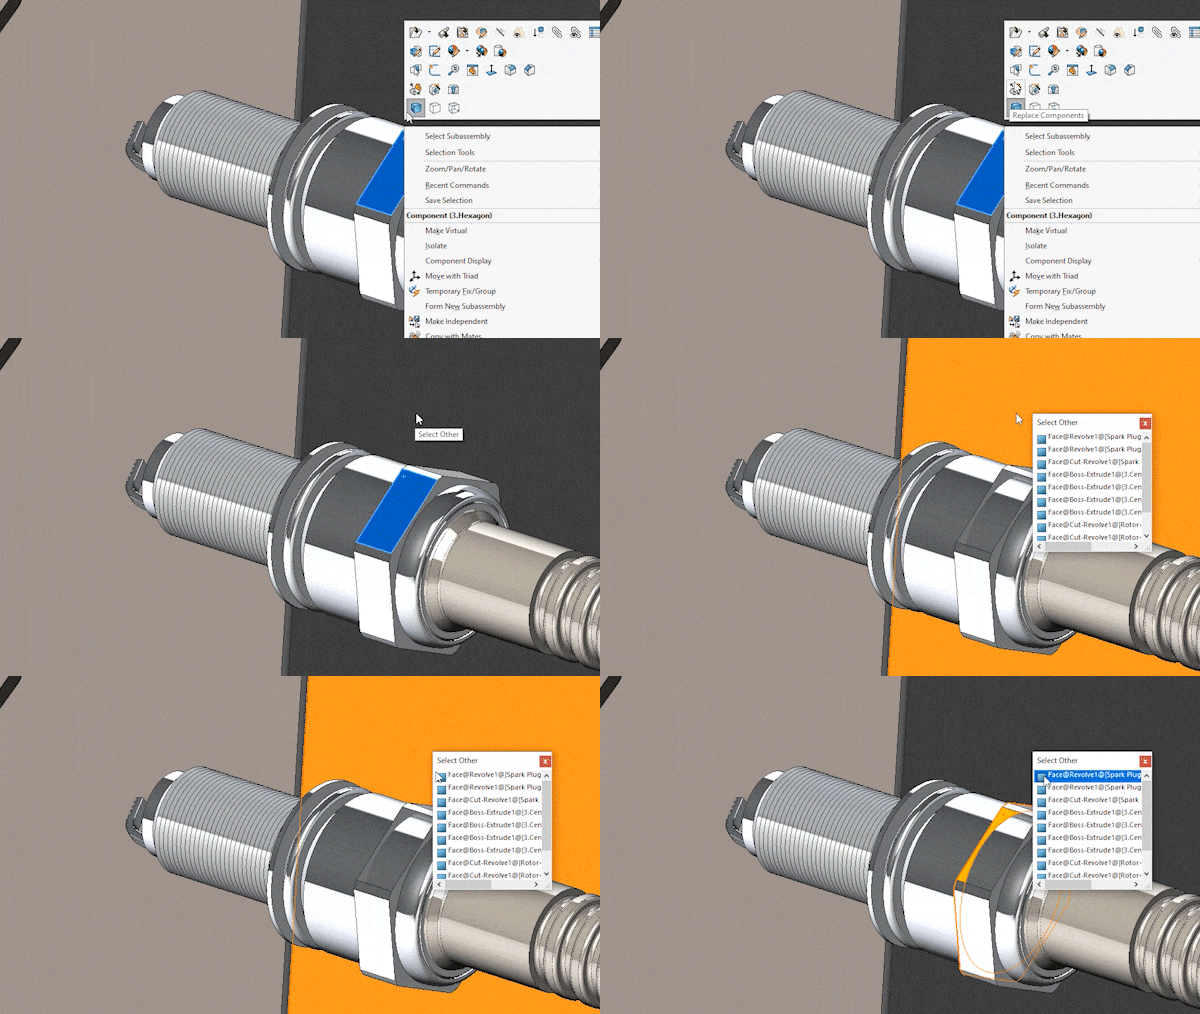
It’s common to need to select faces that can’t be seen, and this can mean constantly rotating a model to get the right selection. A quick way to avoid this rotation is to use select other.
Select other Selects entities that are hidden by other entities, and it can be accessed by right clicking on a component and choosing select other from the content menu. A list will then appear which can be selected from to choose the correct face for selection.
Component Preview Window
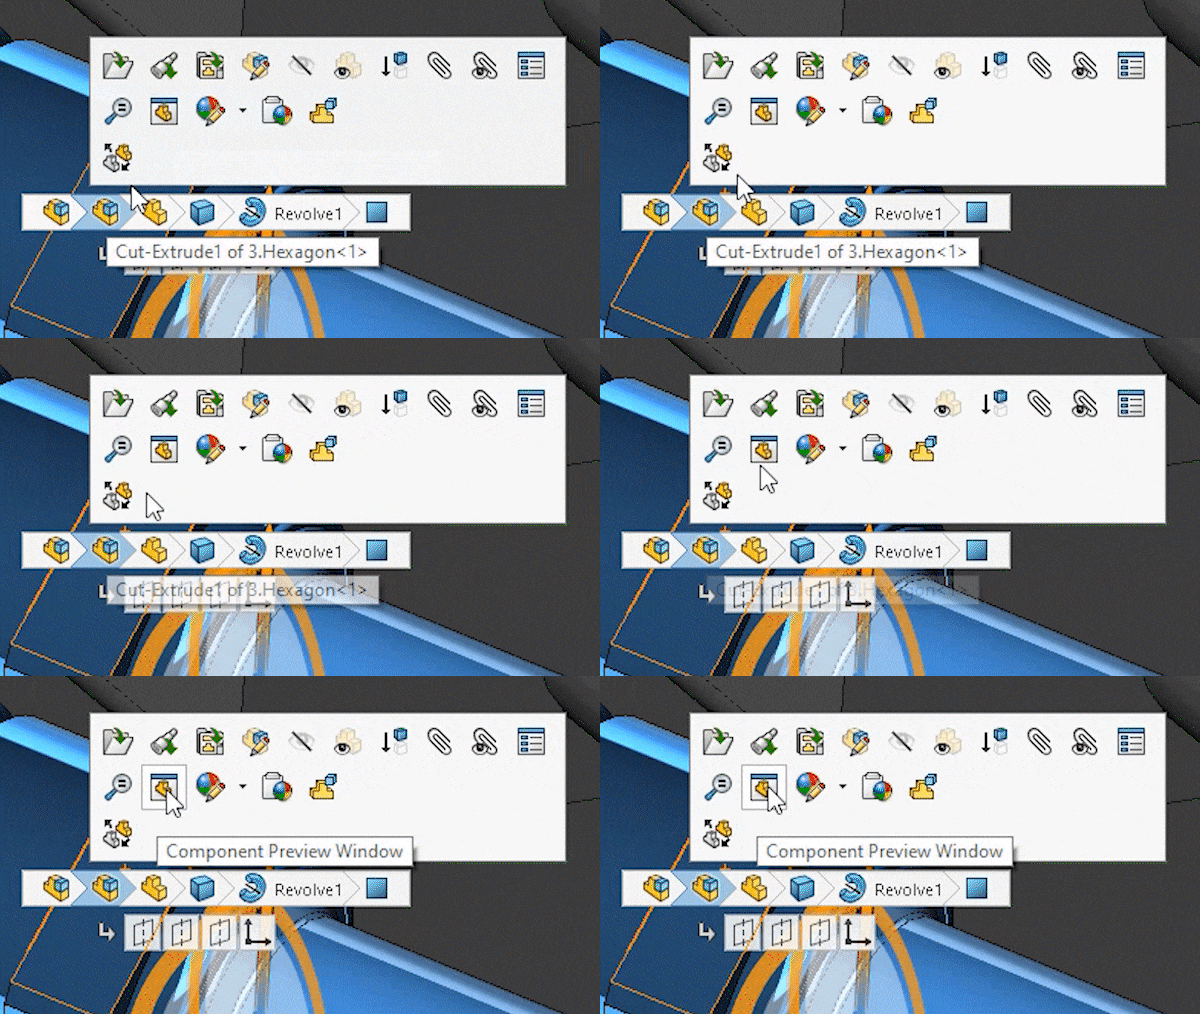
Similar to the use case for select other, the component preview window can be a really useful feature to reduce model rotation and help with selection. From the context menu when selecting any part or subassembly, choose ‘component preview window’. This opens the selection in a new window and the model can be manipulated into any position. You can even add mates across the two windows.
Hide/Show - Tab to Hide - Show hidden components
Assemblies can get complicated quickly, and the larger the assembly the more difficult it becomes to achieve the right selection. This is where hiding and showing components can really help out.
You’ll be aware that parts can be hidden by clicking the eye tool either from the feature manager or from the fly out menu when over a part, but a nice shortcut for this is to simply hover over a part and hit ‘tab’. If you then need to make that part visible again, hover over where the part was and hit ‘shift tab’.
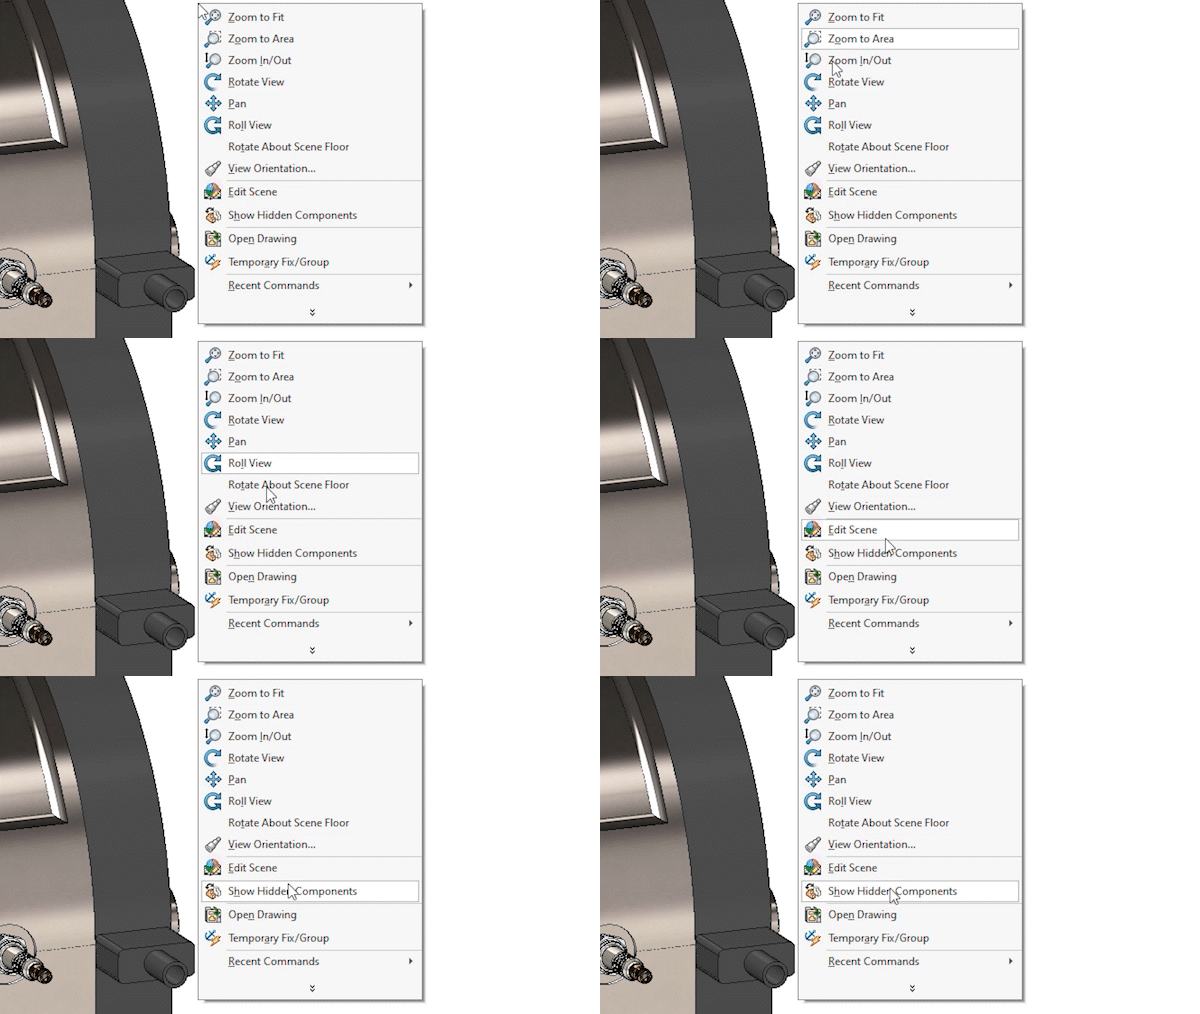
If you’ve hidden a number of parts and want to make them all visible again, right click anywhere in the screen and choose ‘show hidden components’. This inverts the assembly visibility. Now simply click on the components you want to make visible again, or box select, and then exit the show/hidden dialogue.
Show Reference Geometry
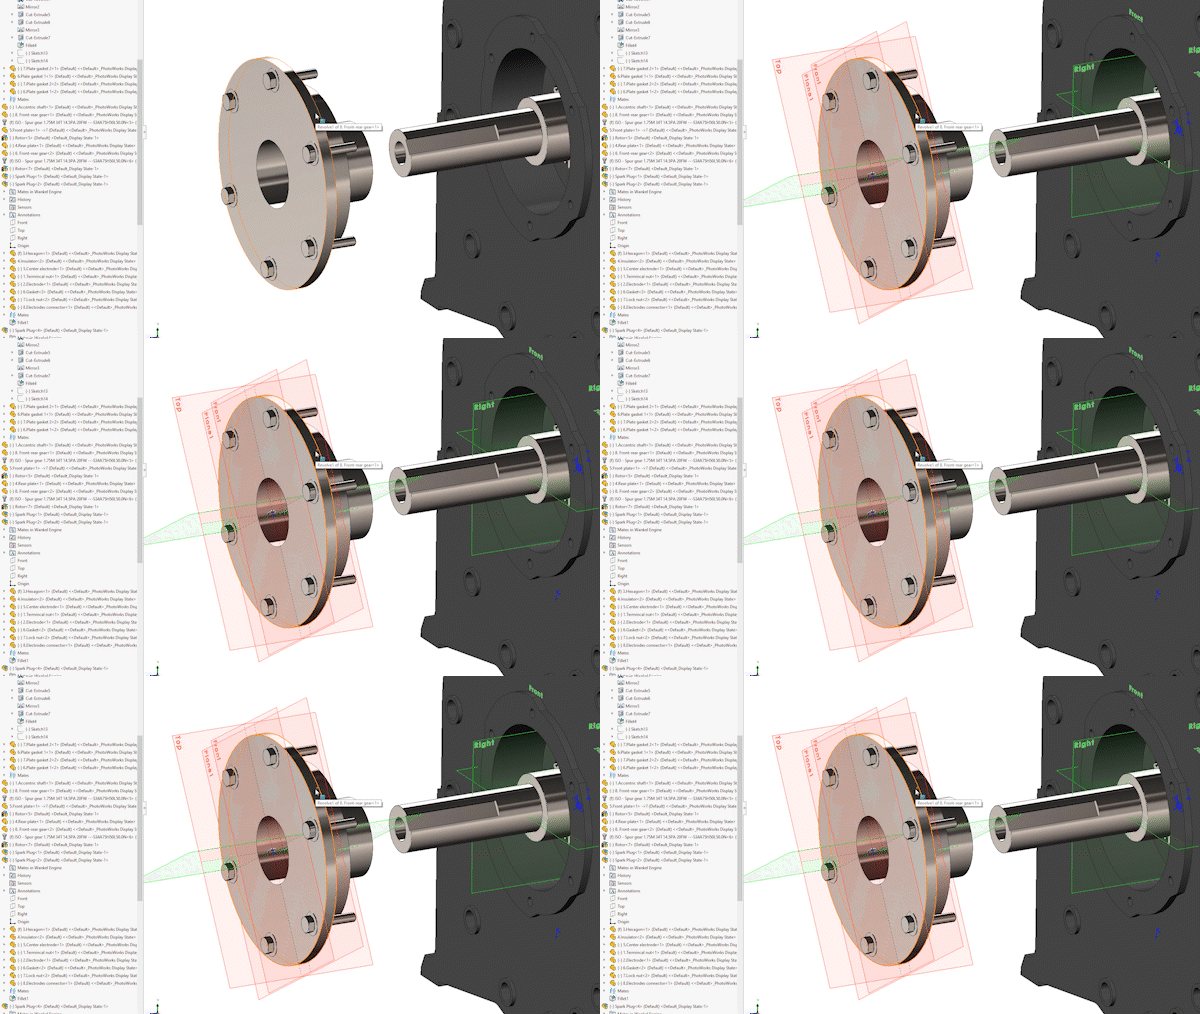
Adding mates to planes within an assembly is an easy way to restrain parts but can require a number of clicks in order to find the required plane. As of SolidWorks 2022, you can simply hover over a part and click ‘Q’ which will display all planes from that component. These can then be selected and used as you would expect.
Collapse Tree
The feature manager often includes multiple levels of assembly, and drilling down into these is a common part of the assembly process. This can leave the feature manager looking quite messy though with multiple sub-assemblies and parts expanded. A quick shortcut to tidy this up is to use Shift+C, which collapses all items.
Check for interferences - Top Level

And finally, the last tip is to use interference detection. Found on the evaluate tab, interference detection analyses your assembly model and highlights if there are any shared volumes. Overlapping parts can’t exist in reality so it’s important to catch these errors during the design stage before anything goes into manufacture.


